To create a new lease for a unit follow the steps:
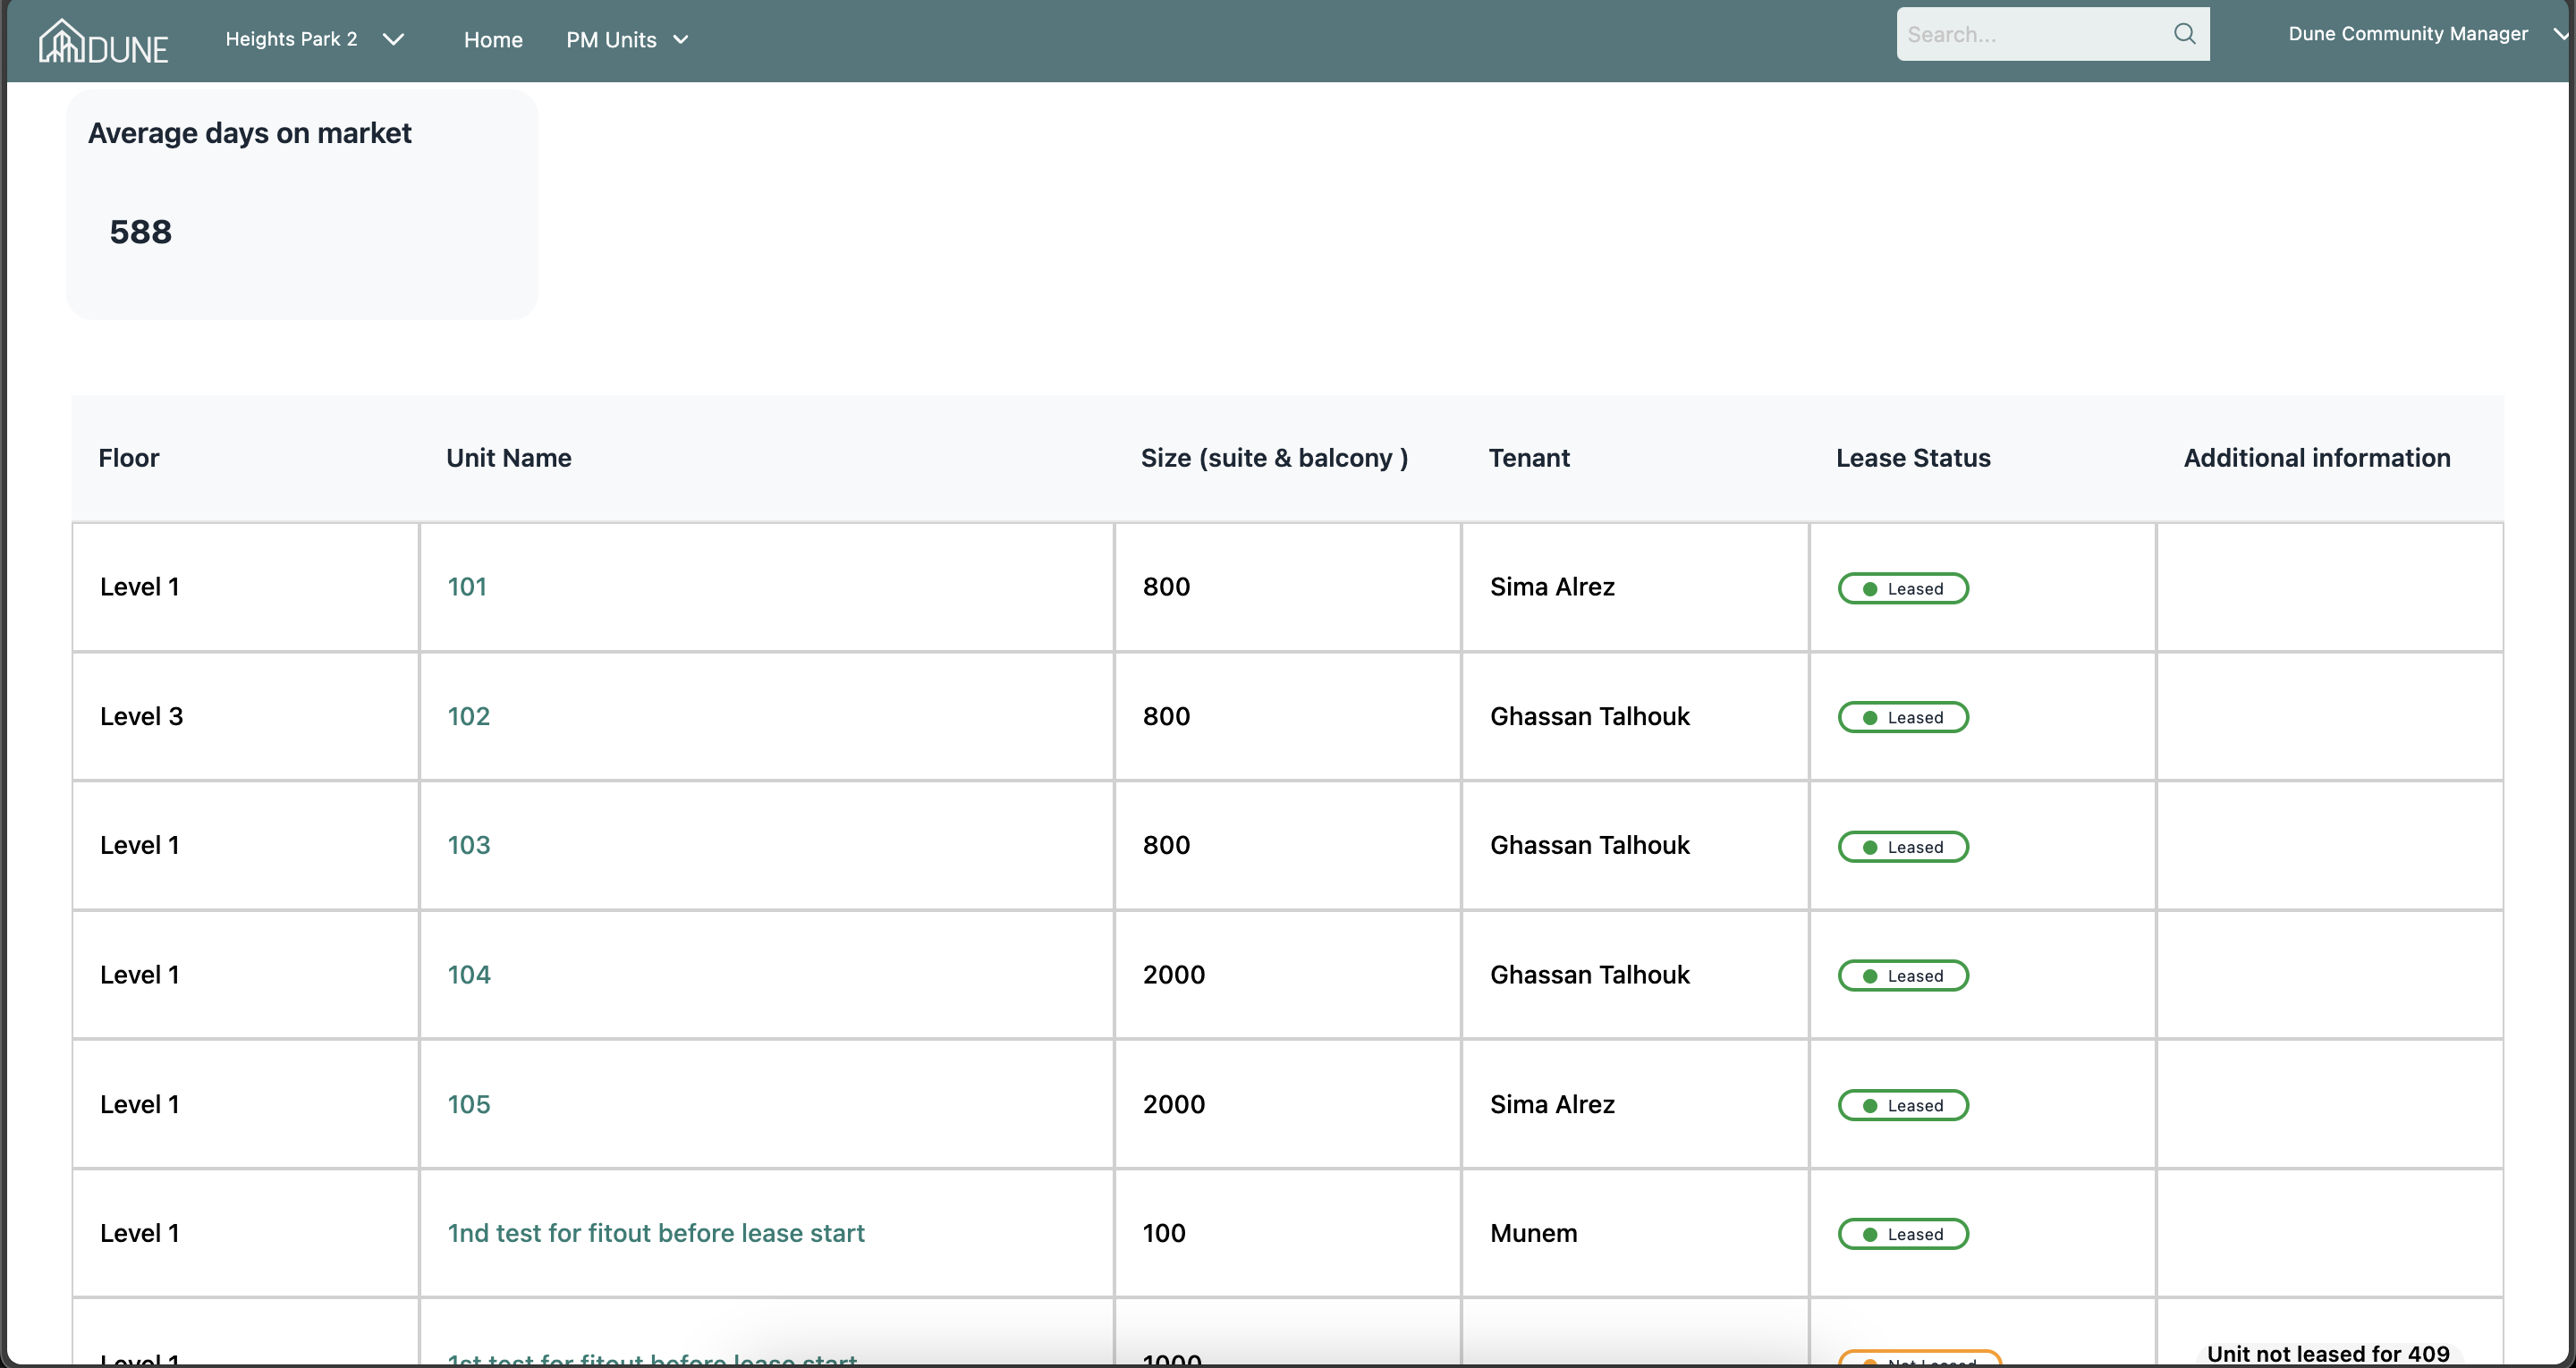
Access the Unit:
Go to the property group, select the PM units list, and choose a unit by clicking on its name
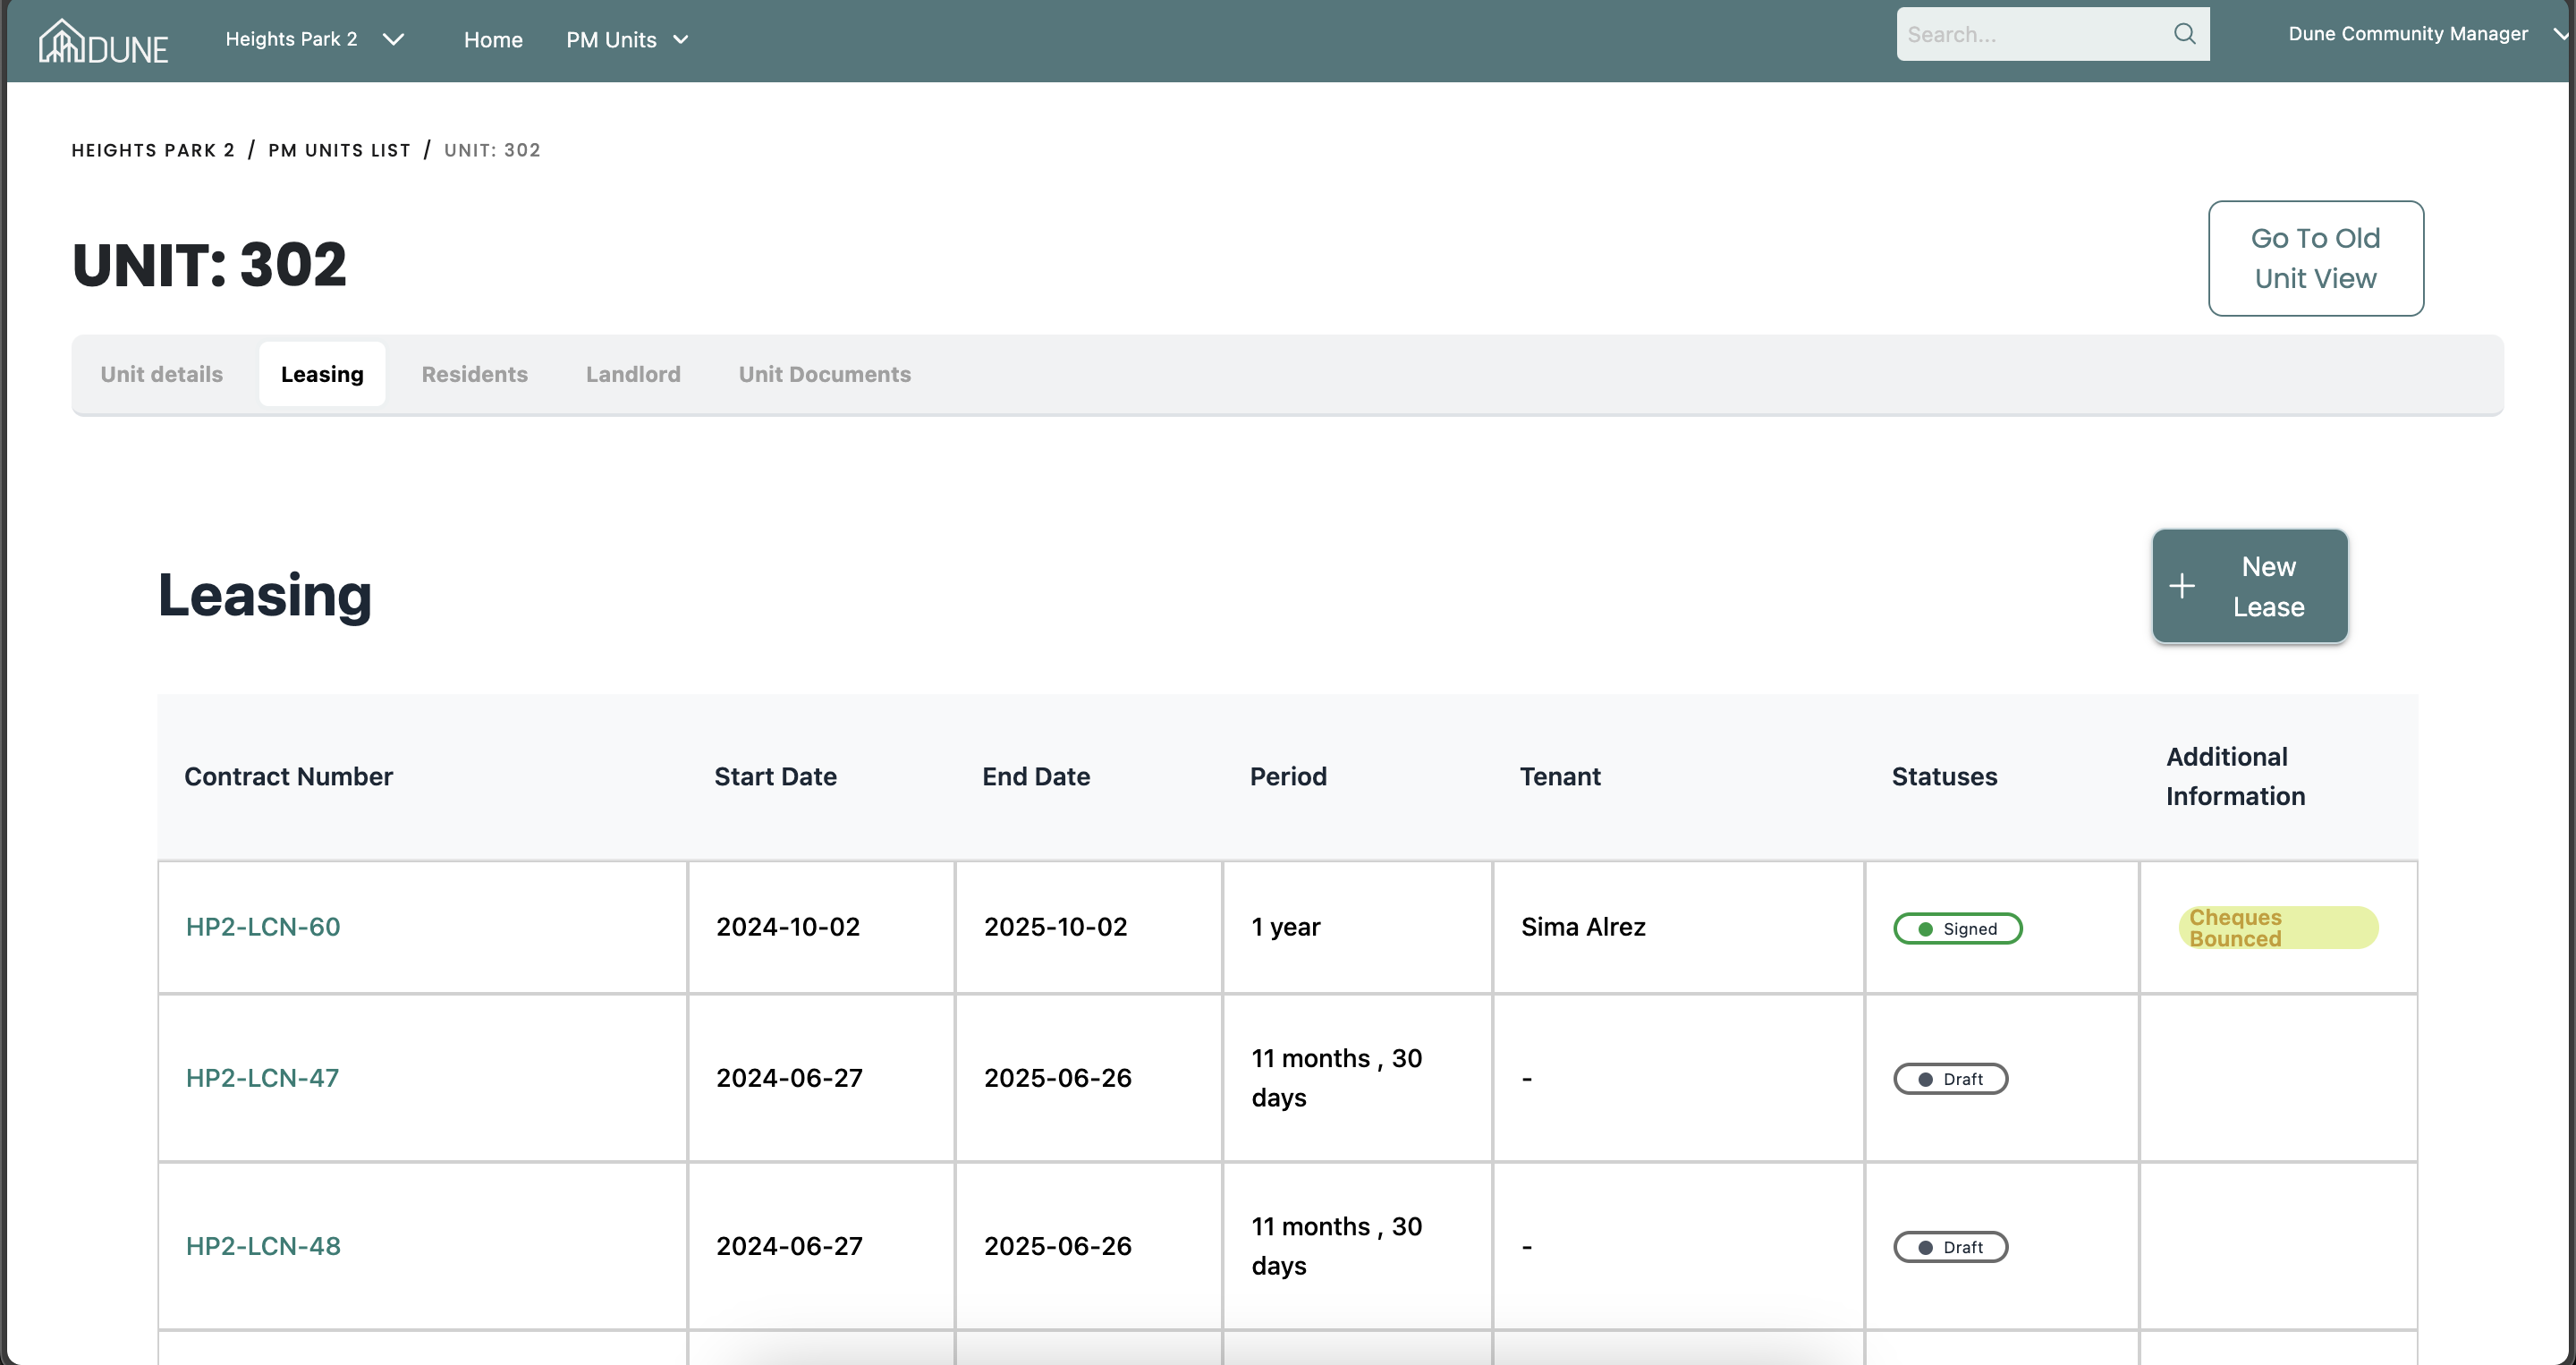
Create a New Lease:
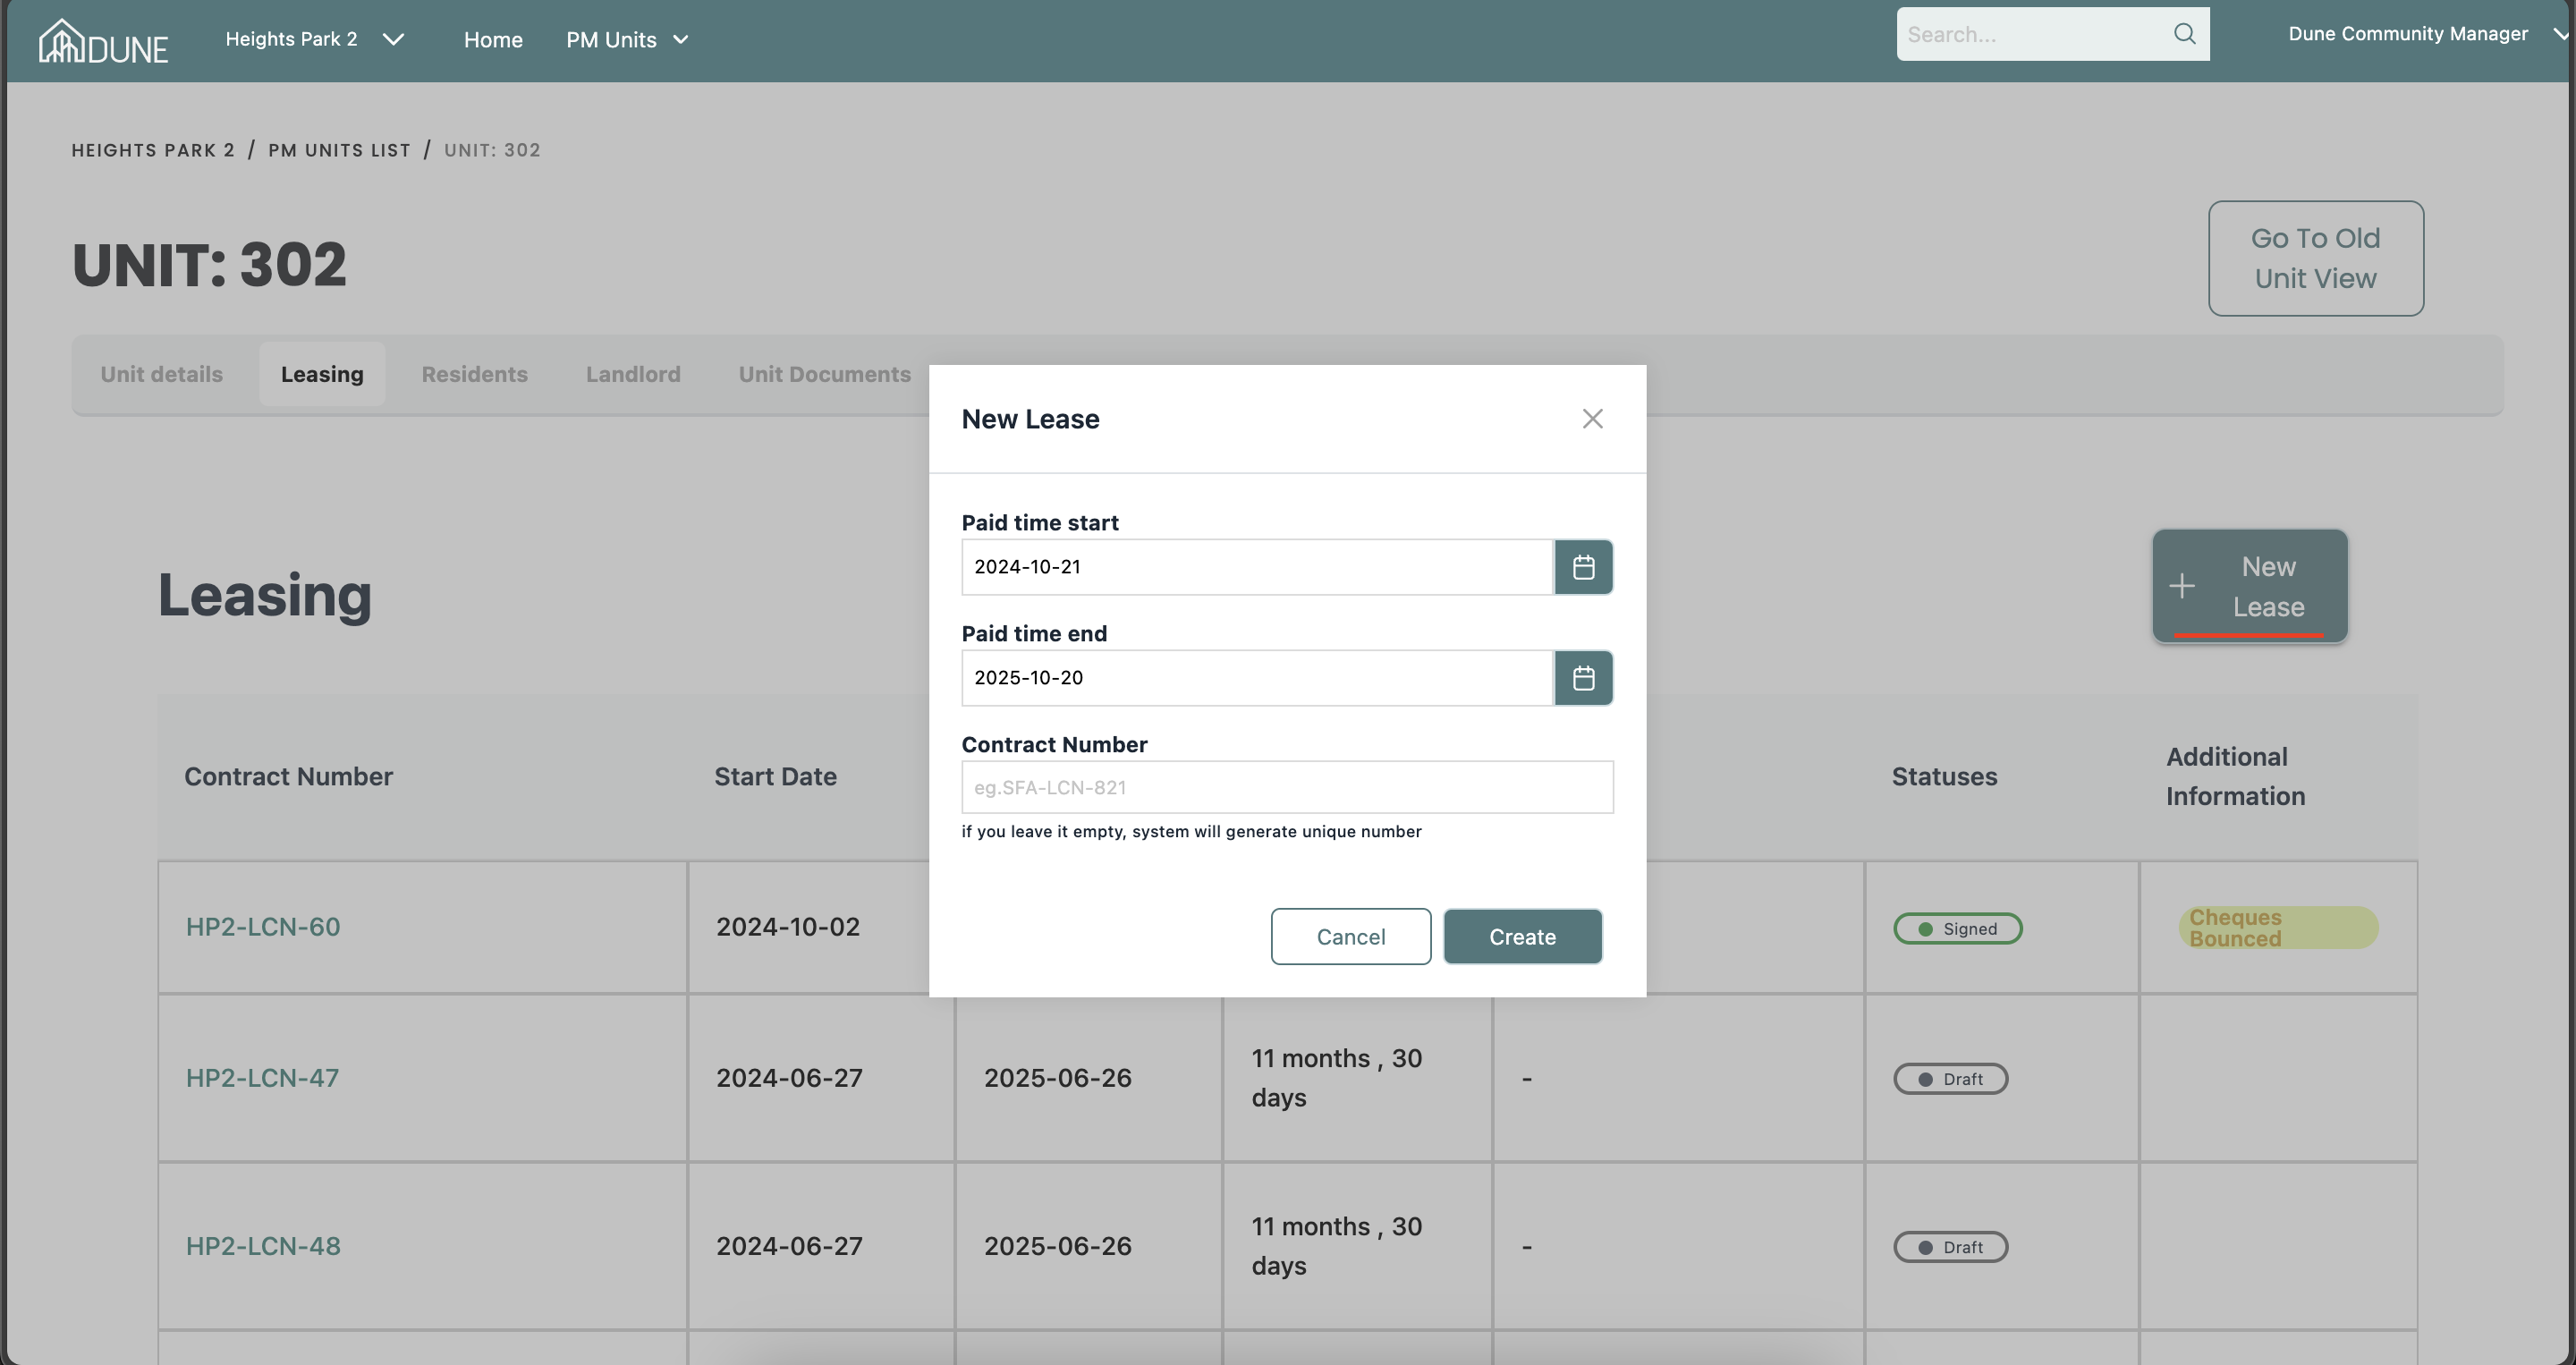
Click on the New Lease button. A pop-up screen will appear where you can enter the lease start and end dates. You can also add the contract number or leave it blank for the system to auto-generate one.
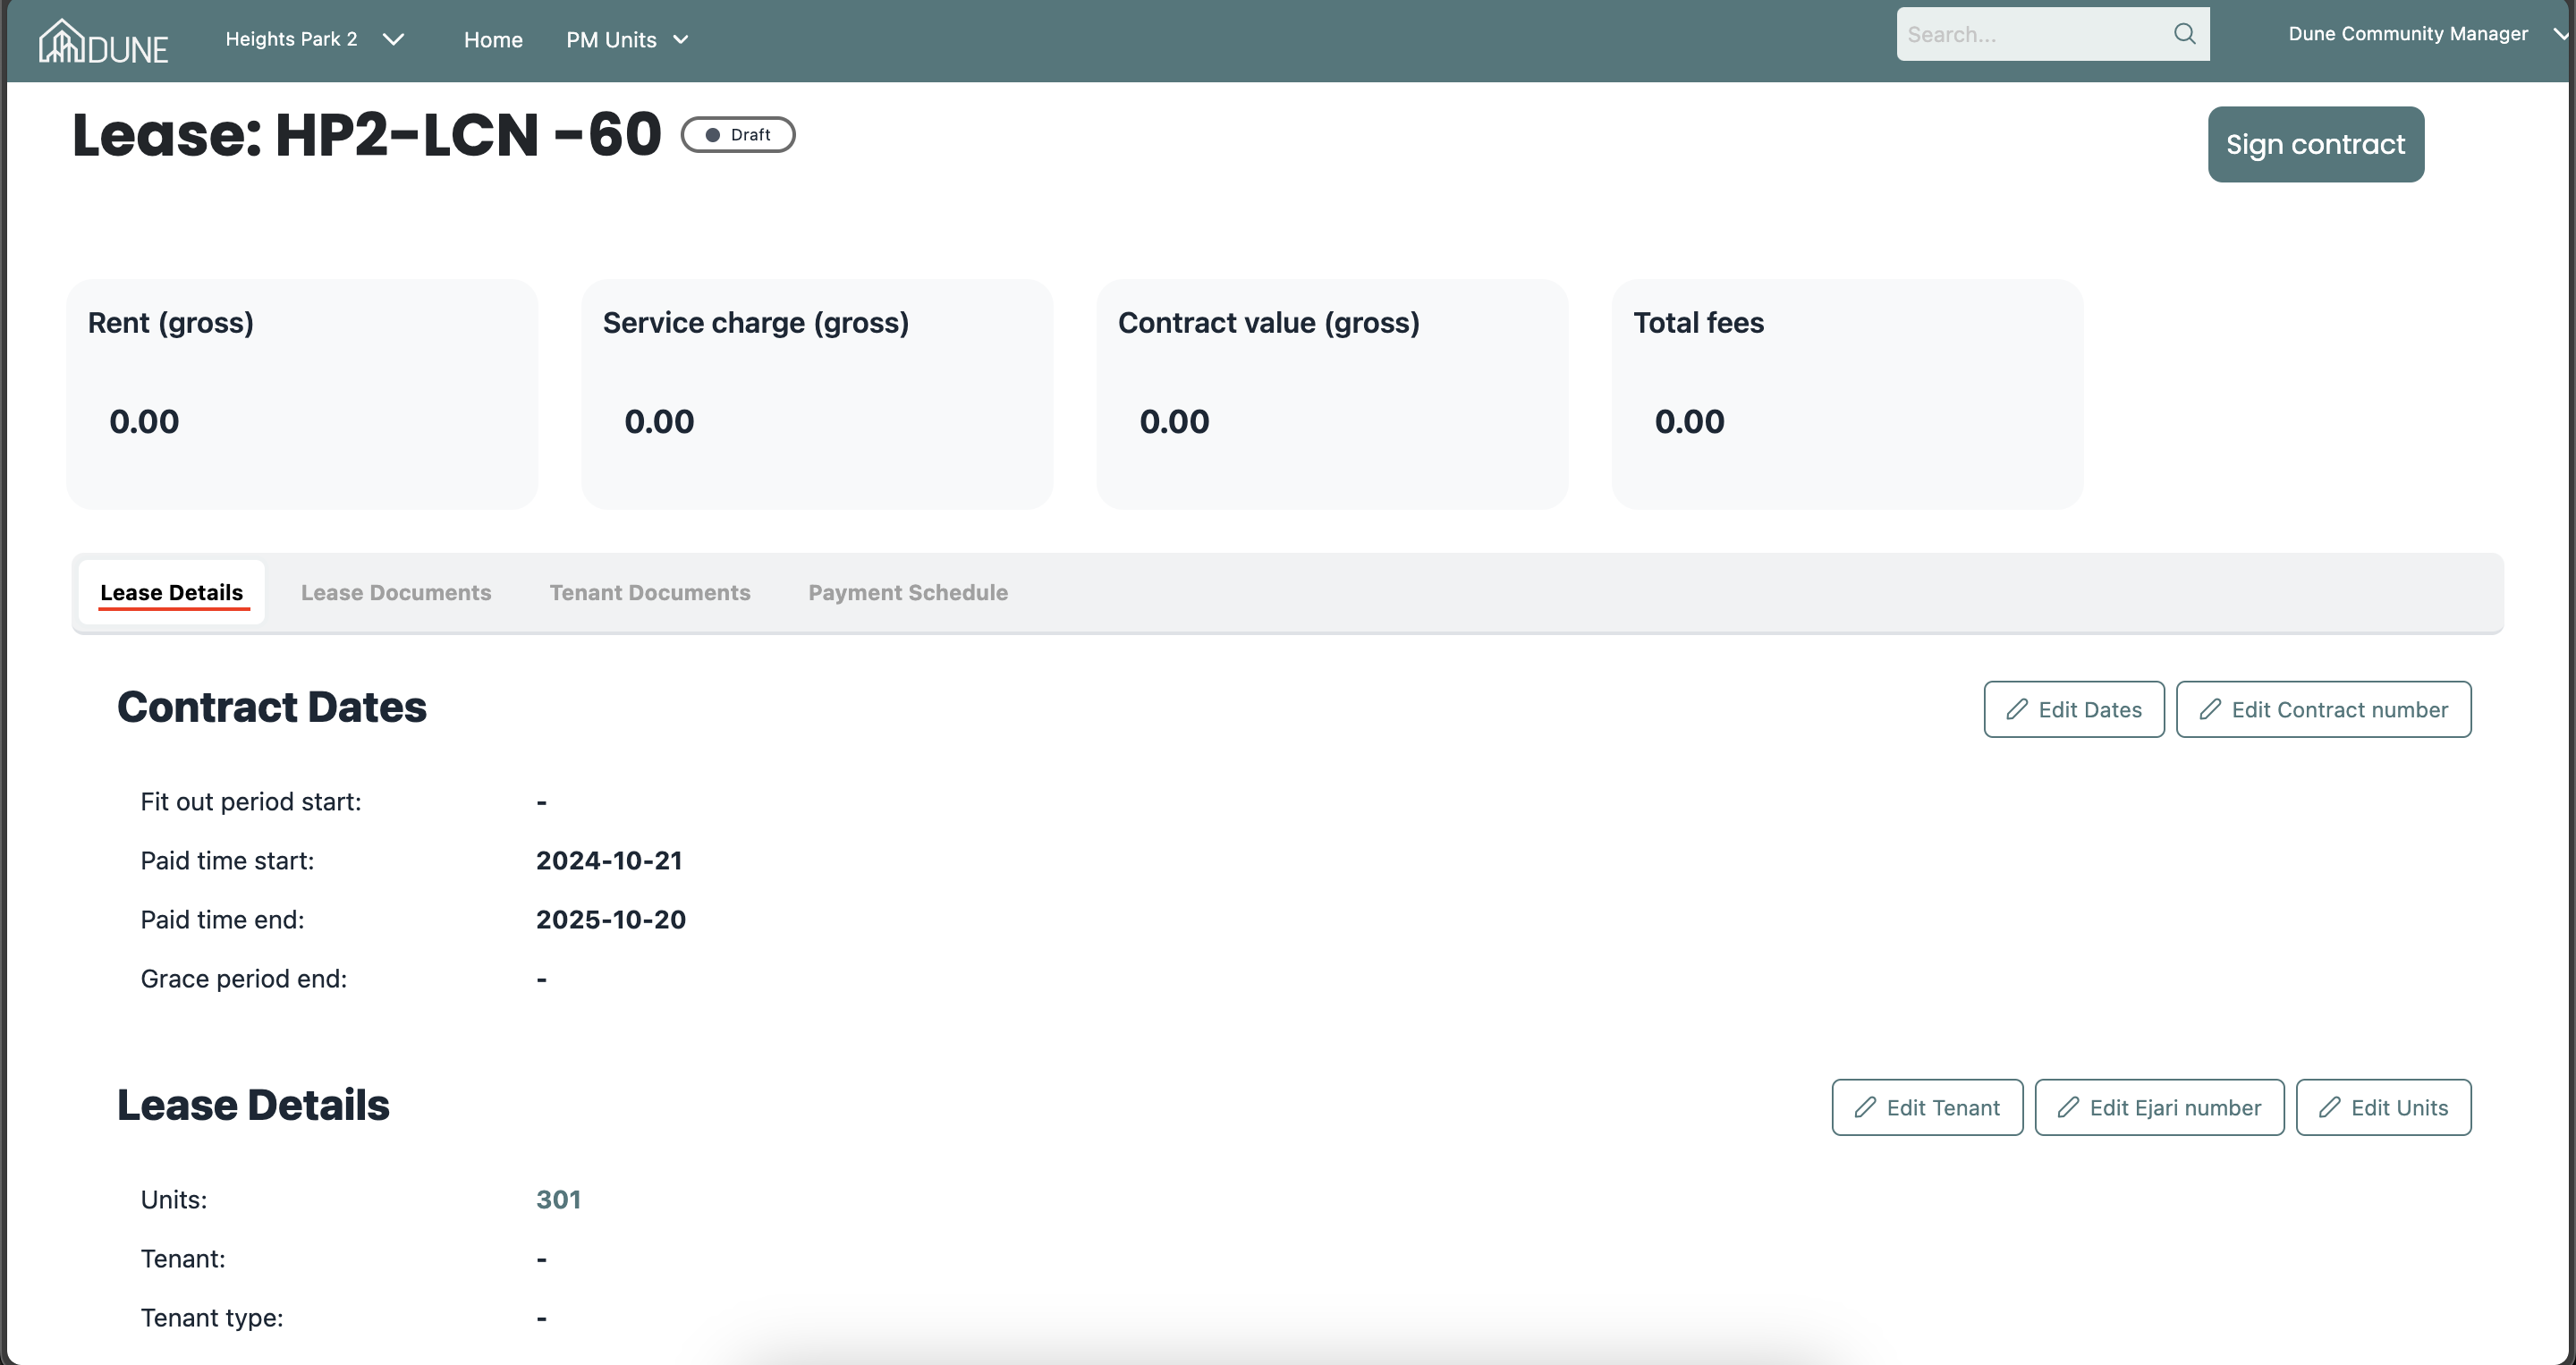
Create the draft lease:
After selecting Create, a draft lease screen will open. Here, you can view and edit lease details, including the fit-out or grace period if applicable. Tenant details can also be added in this section.
Upload Required Documents:
In the Lease Documents tab, upload the necessary documents:
- Cheque Copy
- Tenancy Contract

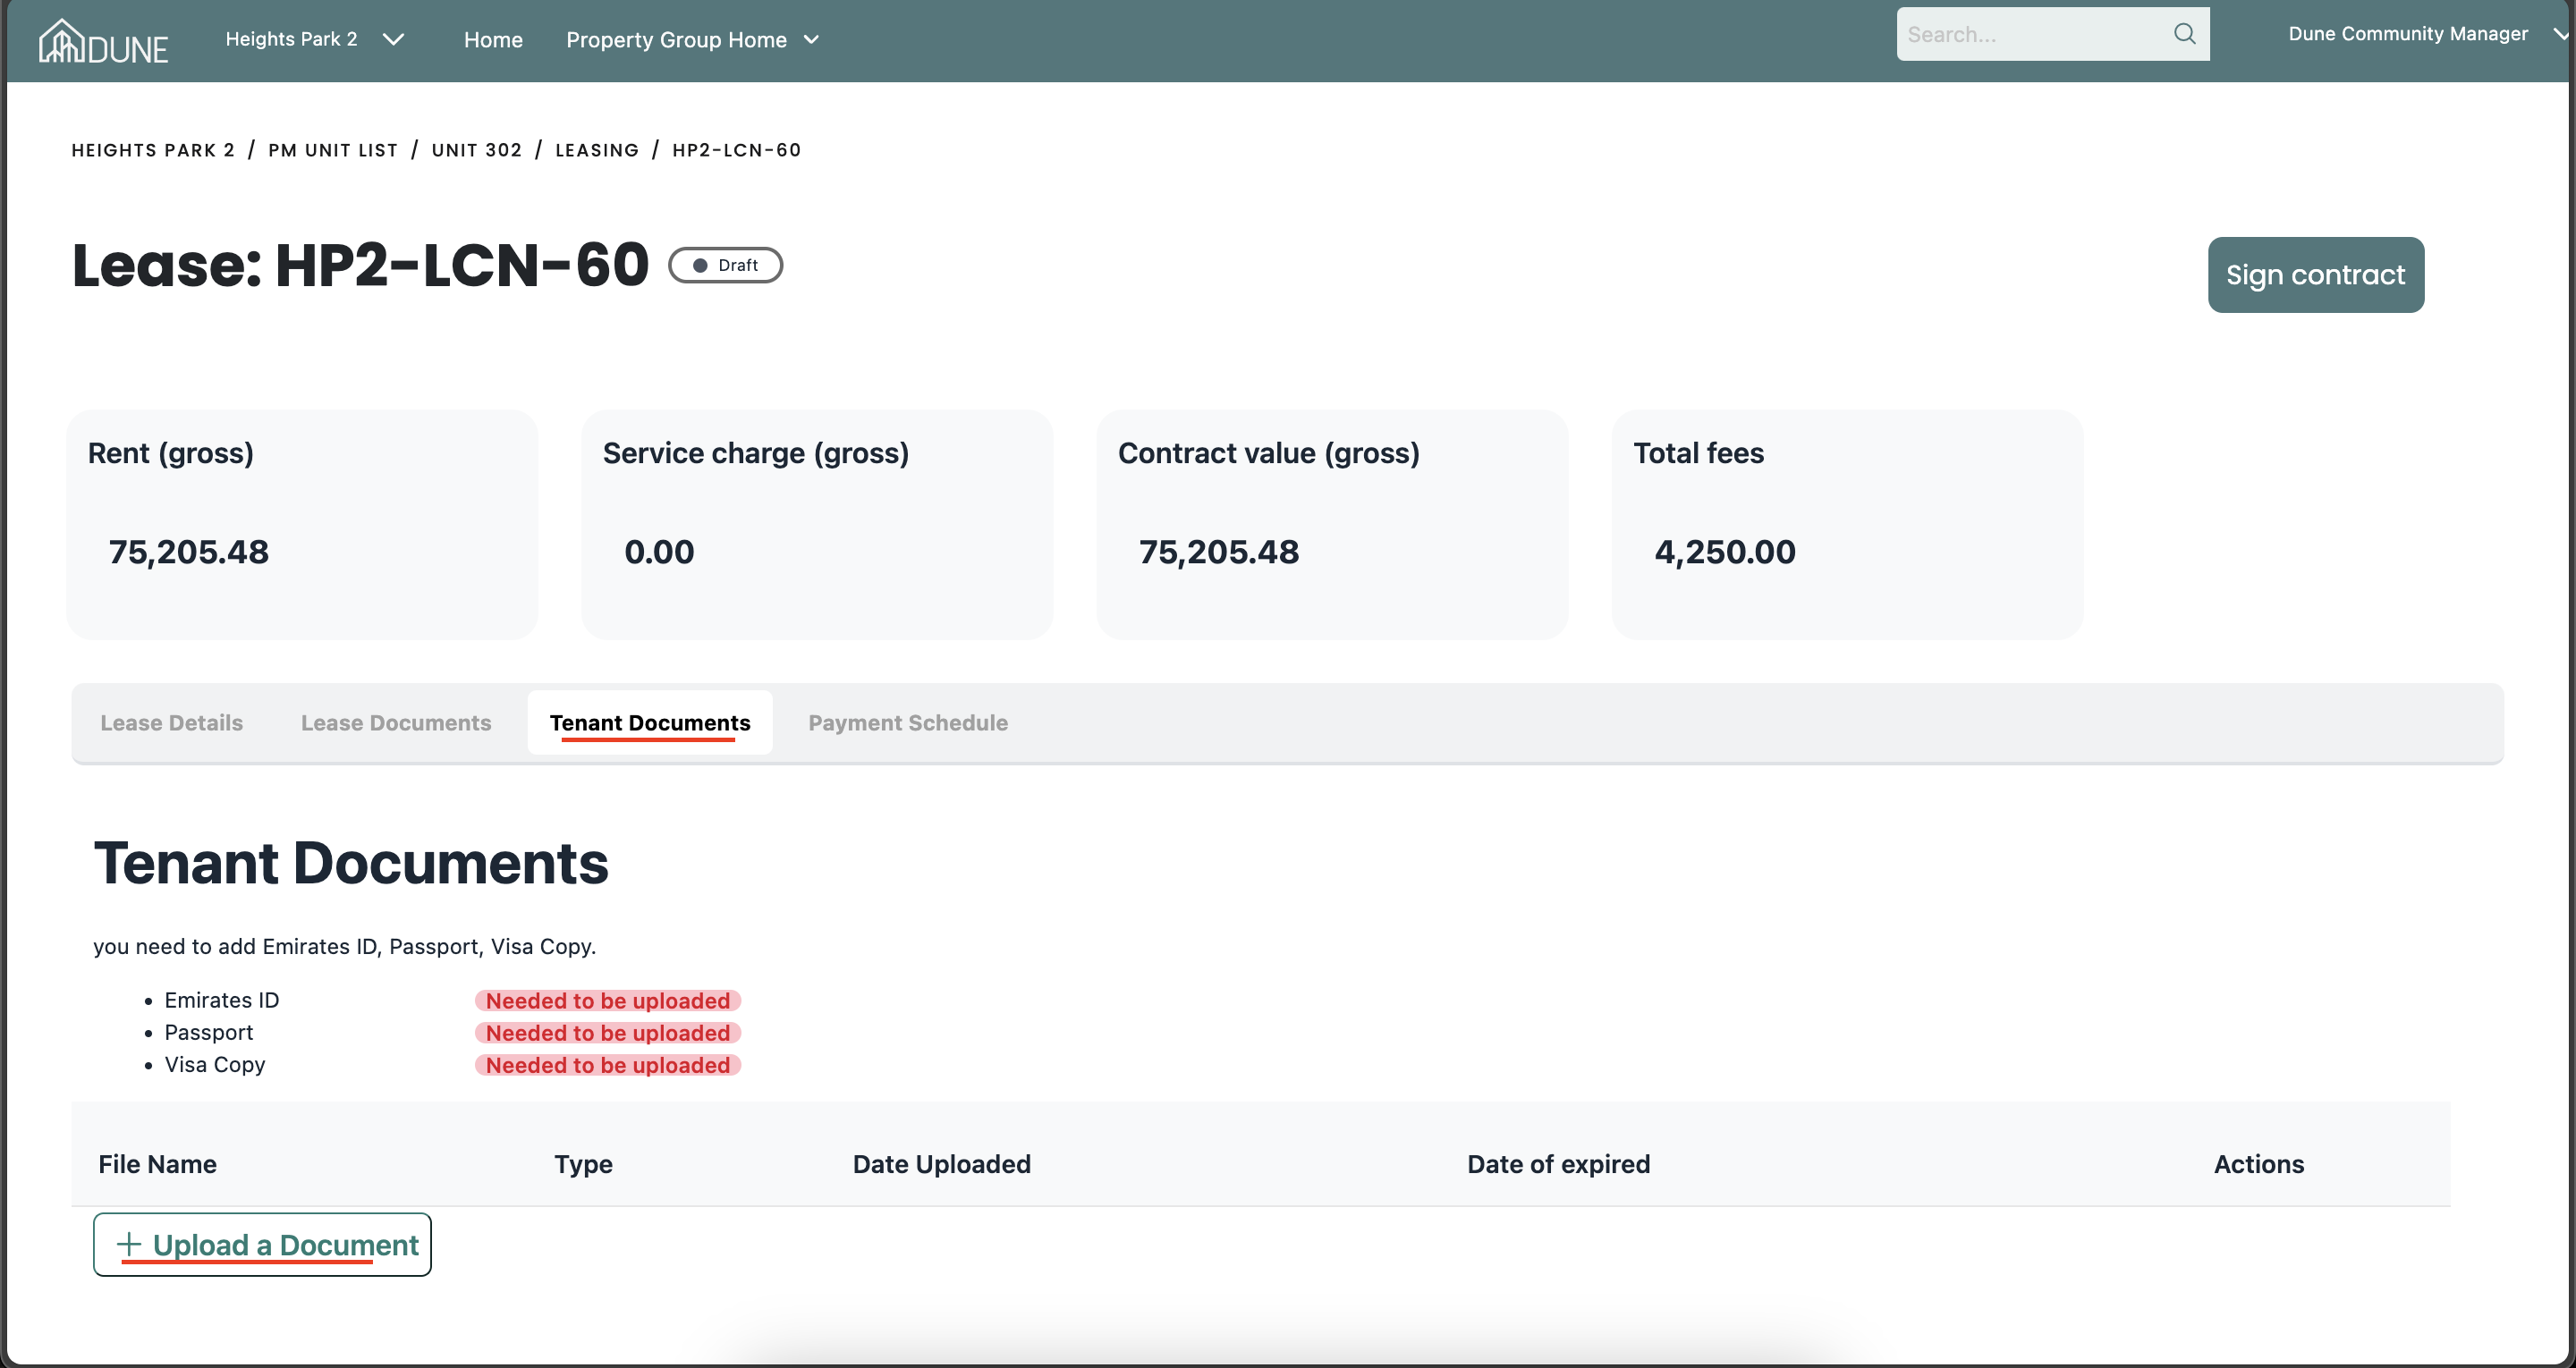
- In the Tenant Documents tab, upload the necessary documents:
- Emirates ID
- Passport
- Visa Copy
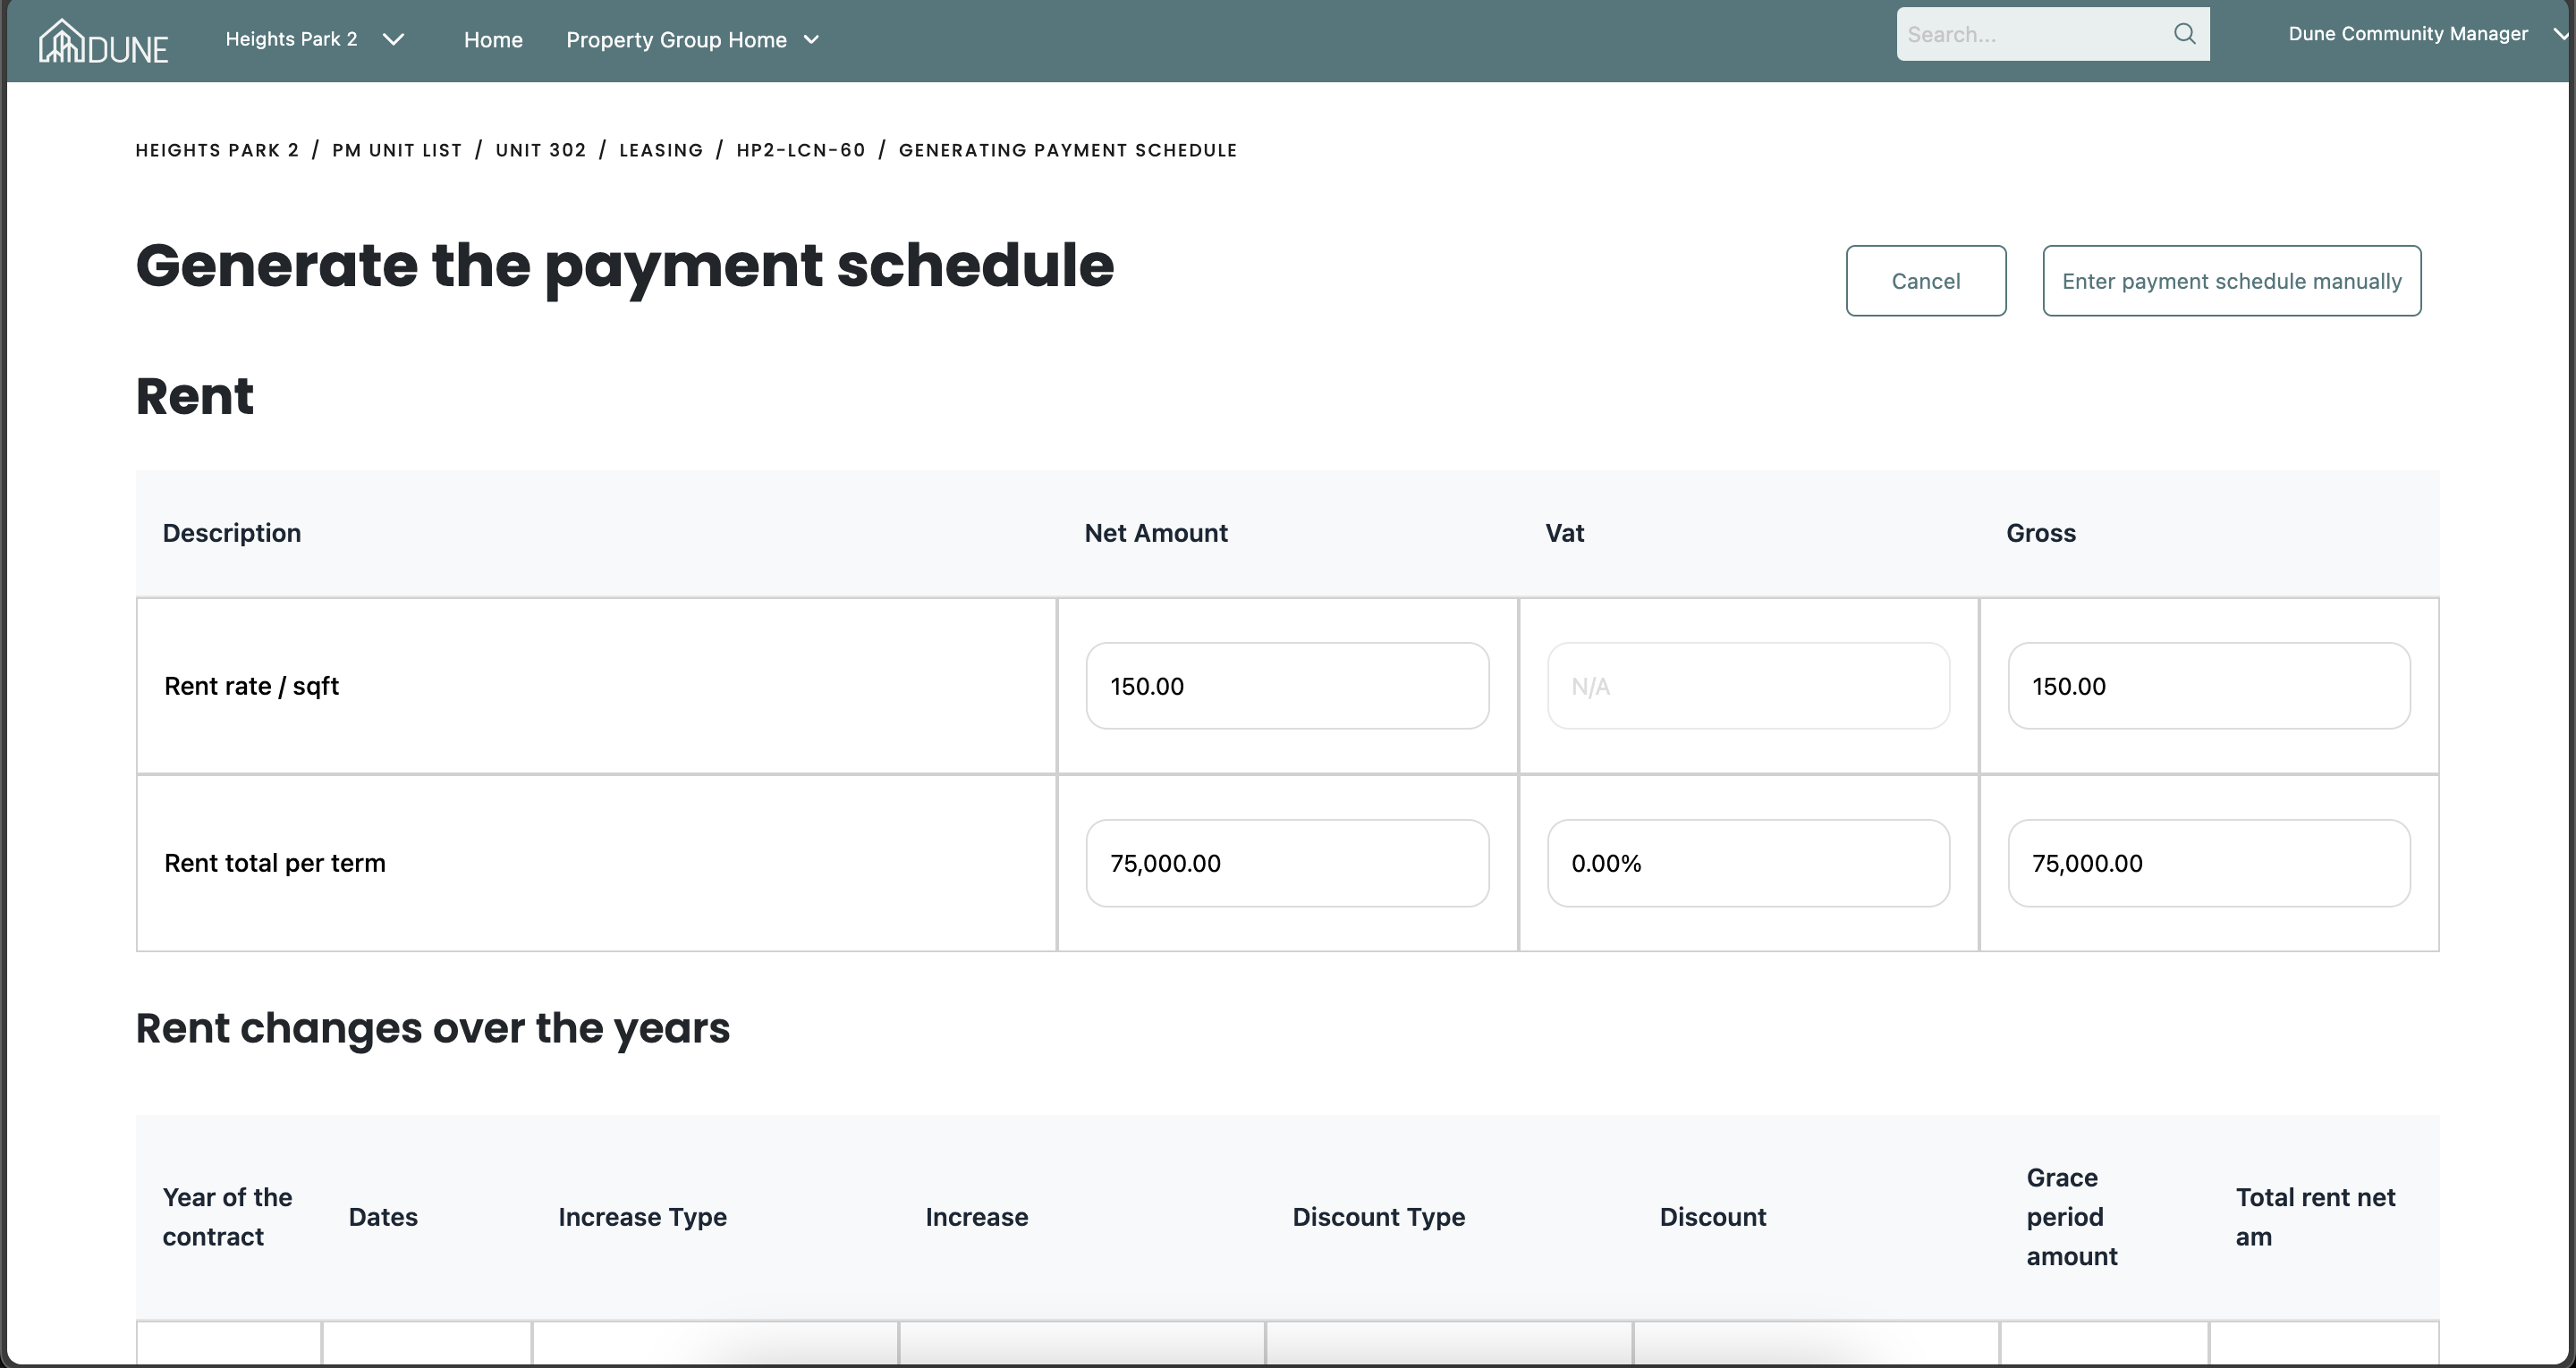
Set Up the Payment Schedule
Go to the Payment Schedule tab and click Generate. The payment schedule screen will open, allowing you to prepare your payment schedule as needed.

Generate Payments:
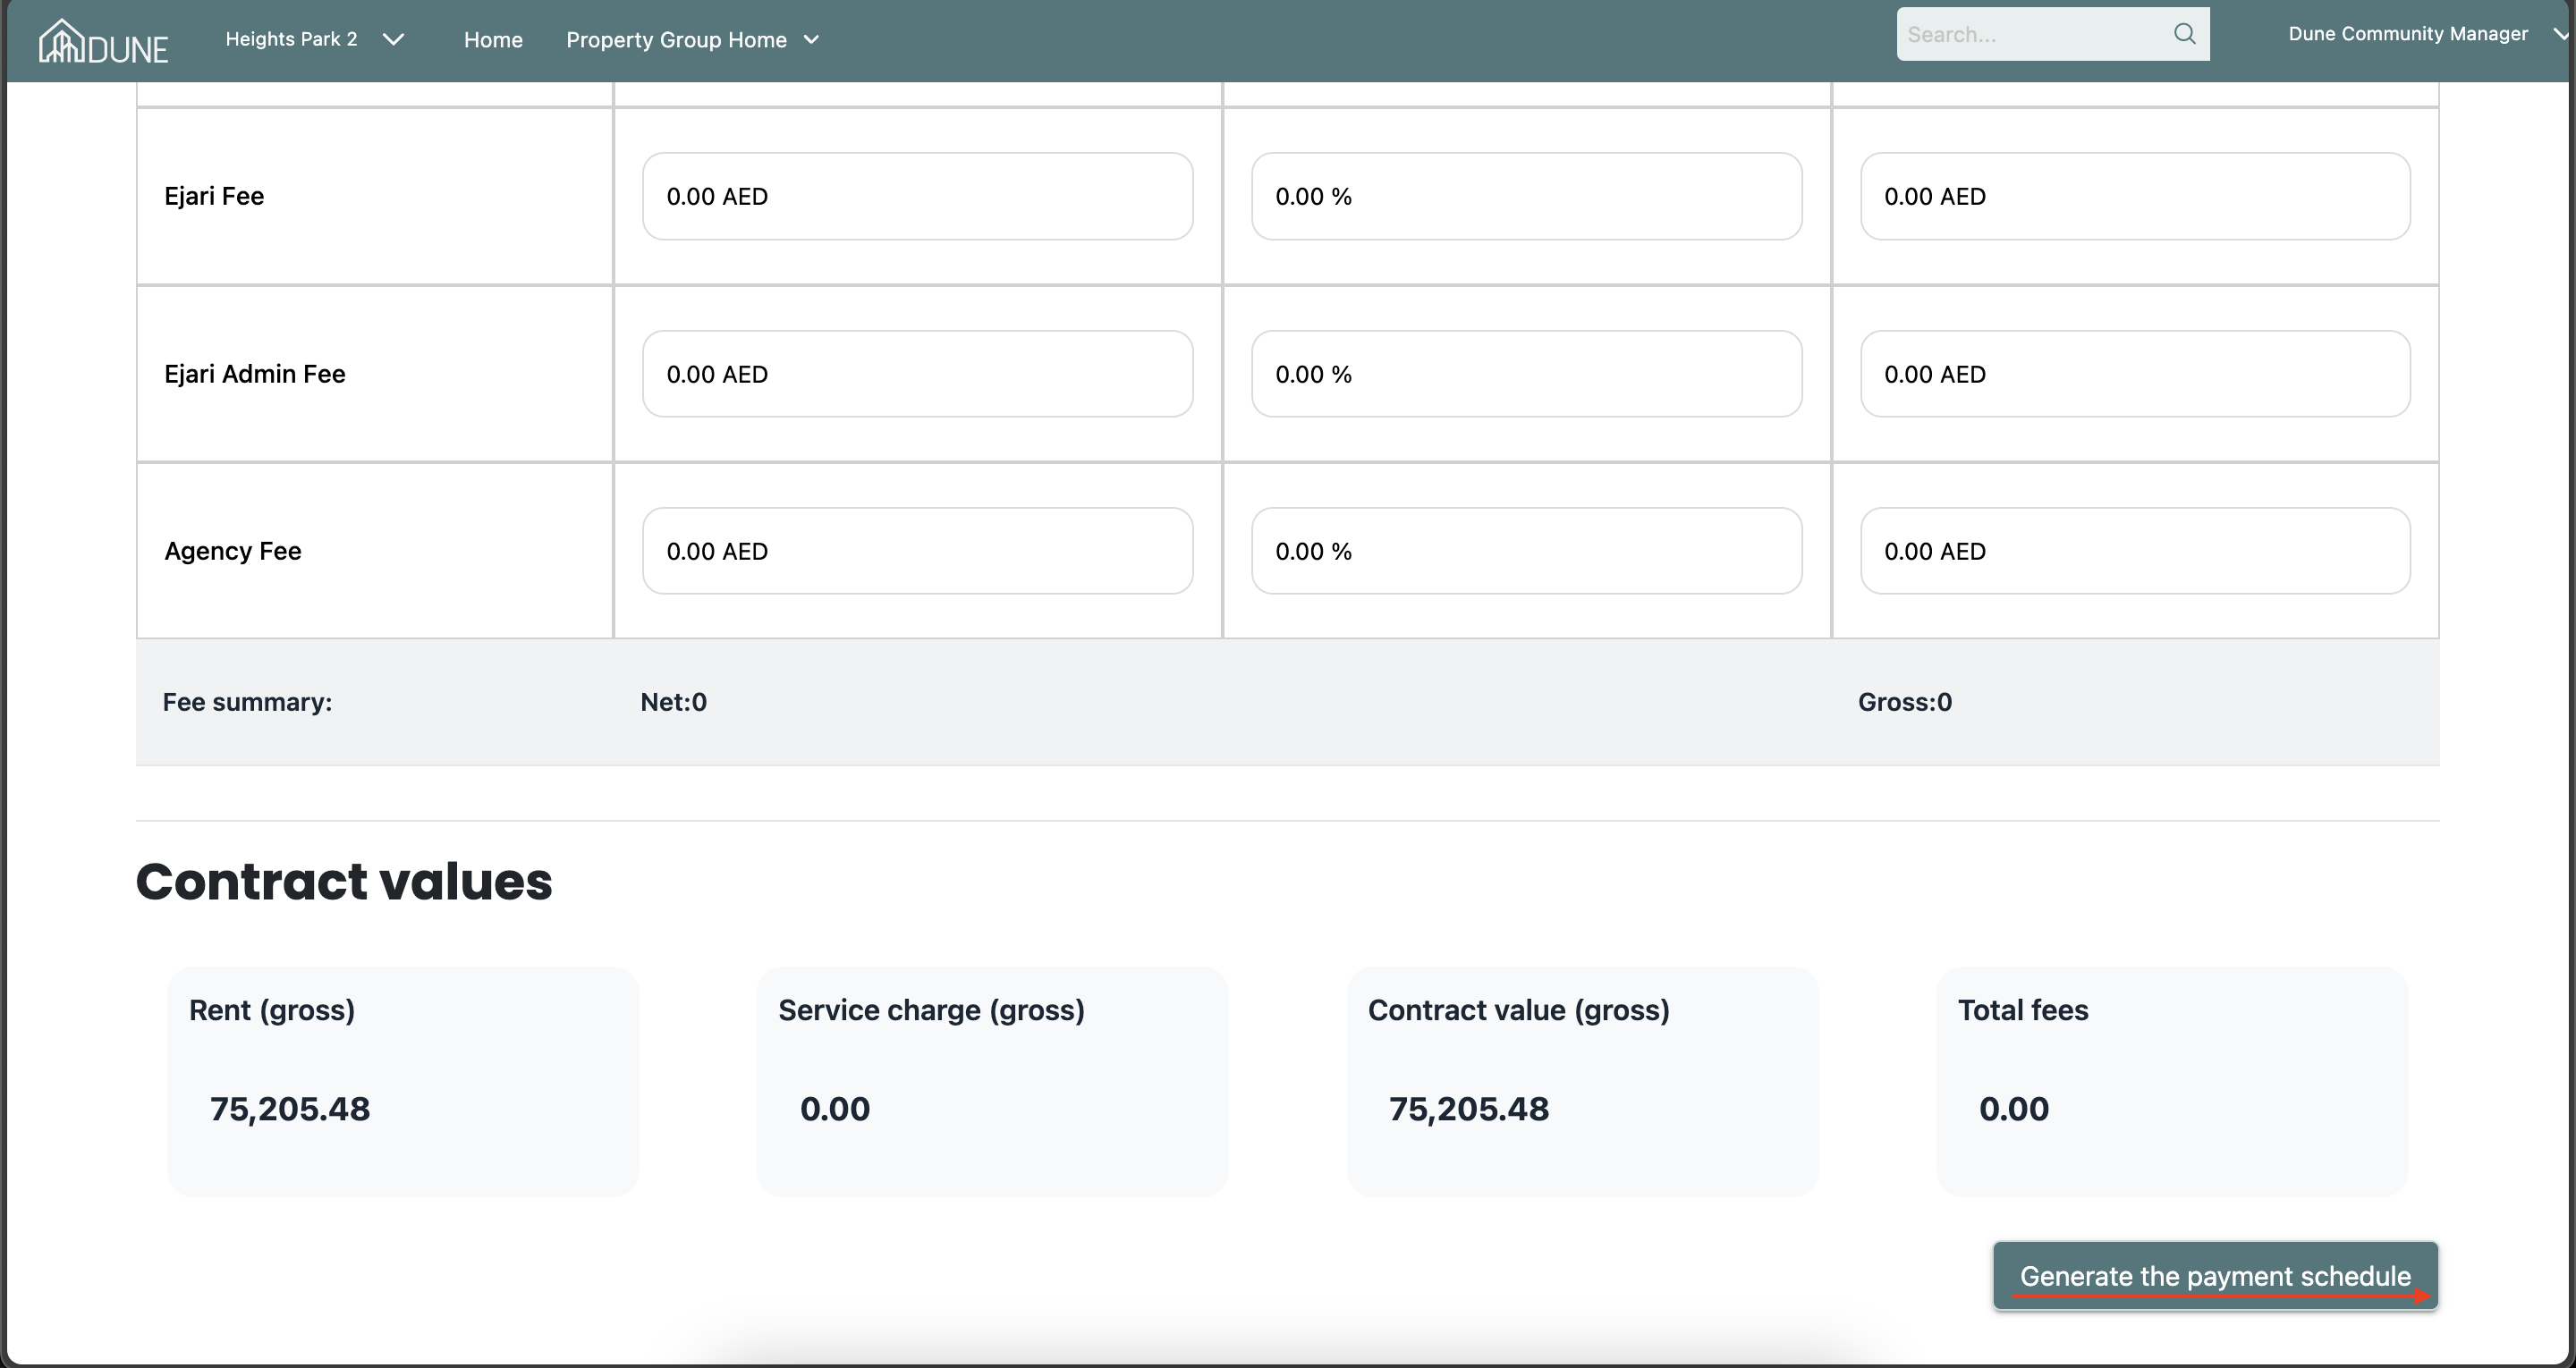
On the Generate the Payment Schedule screen, you can add payments such as rent installments, service charges, and fees. After reviewing and confirming all values, click Generate the Payment Schedule.
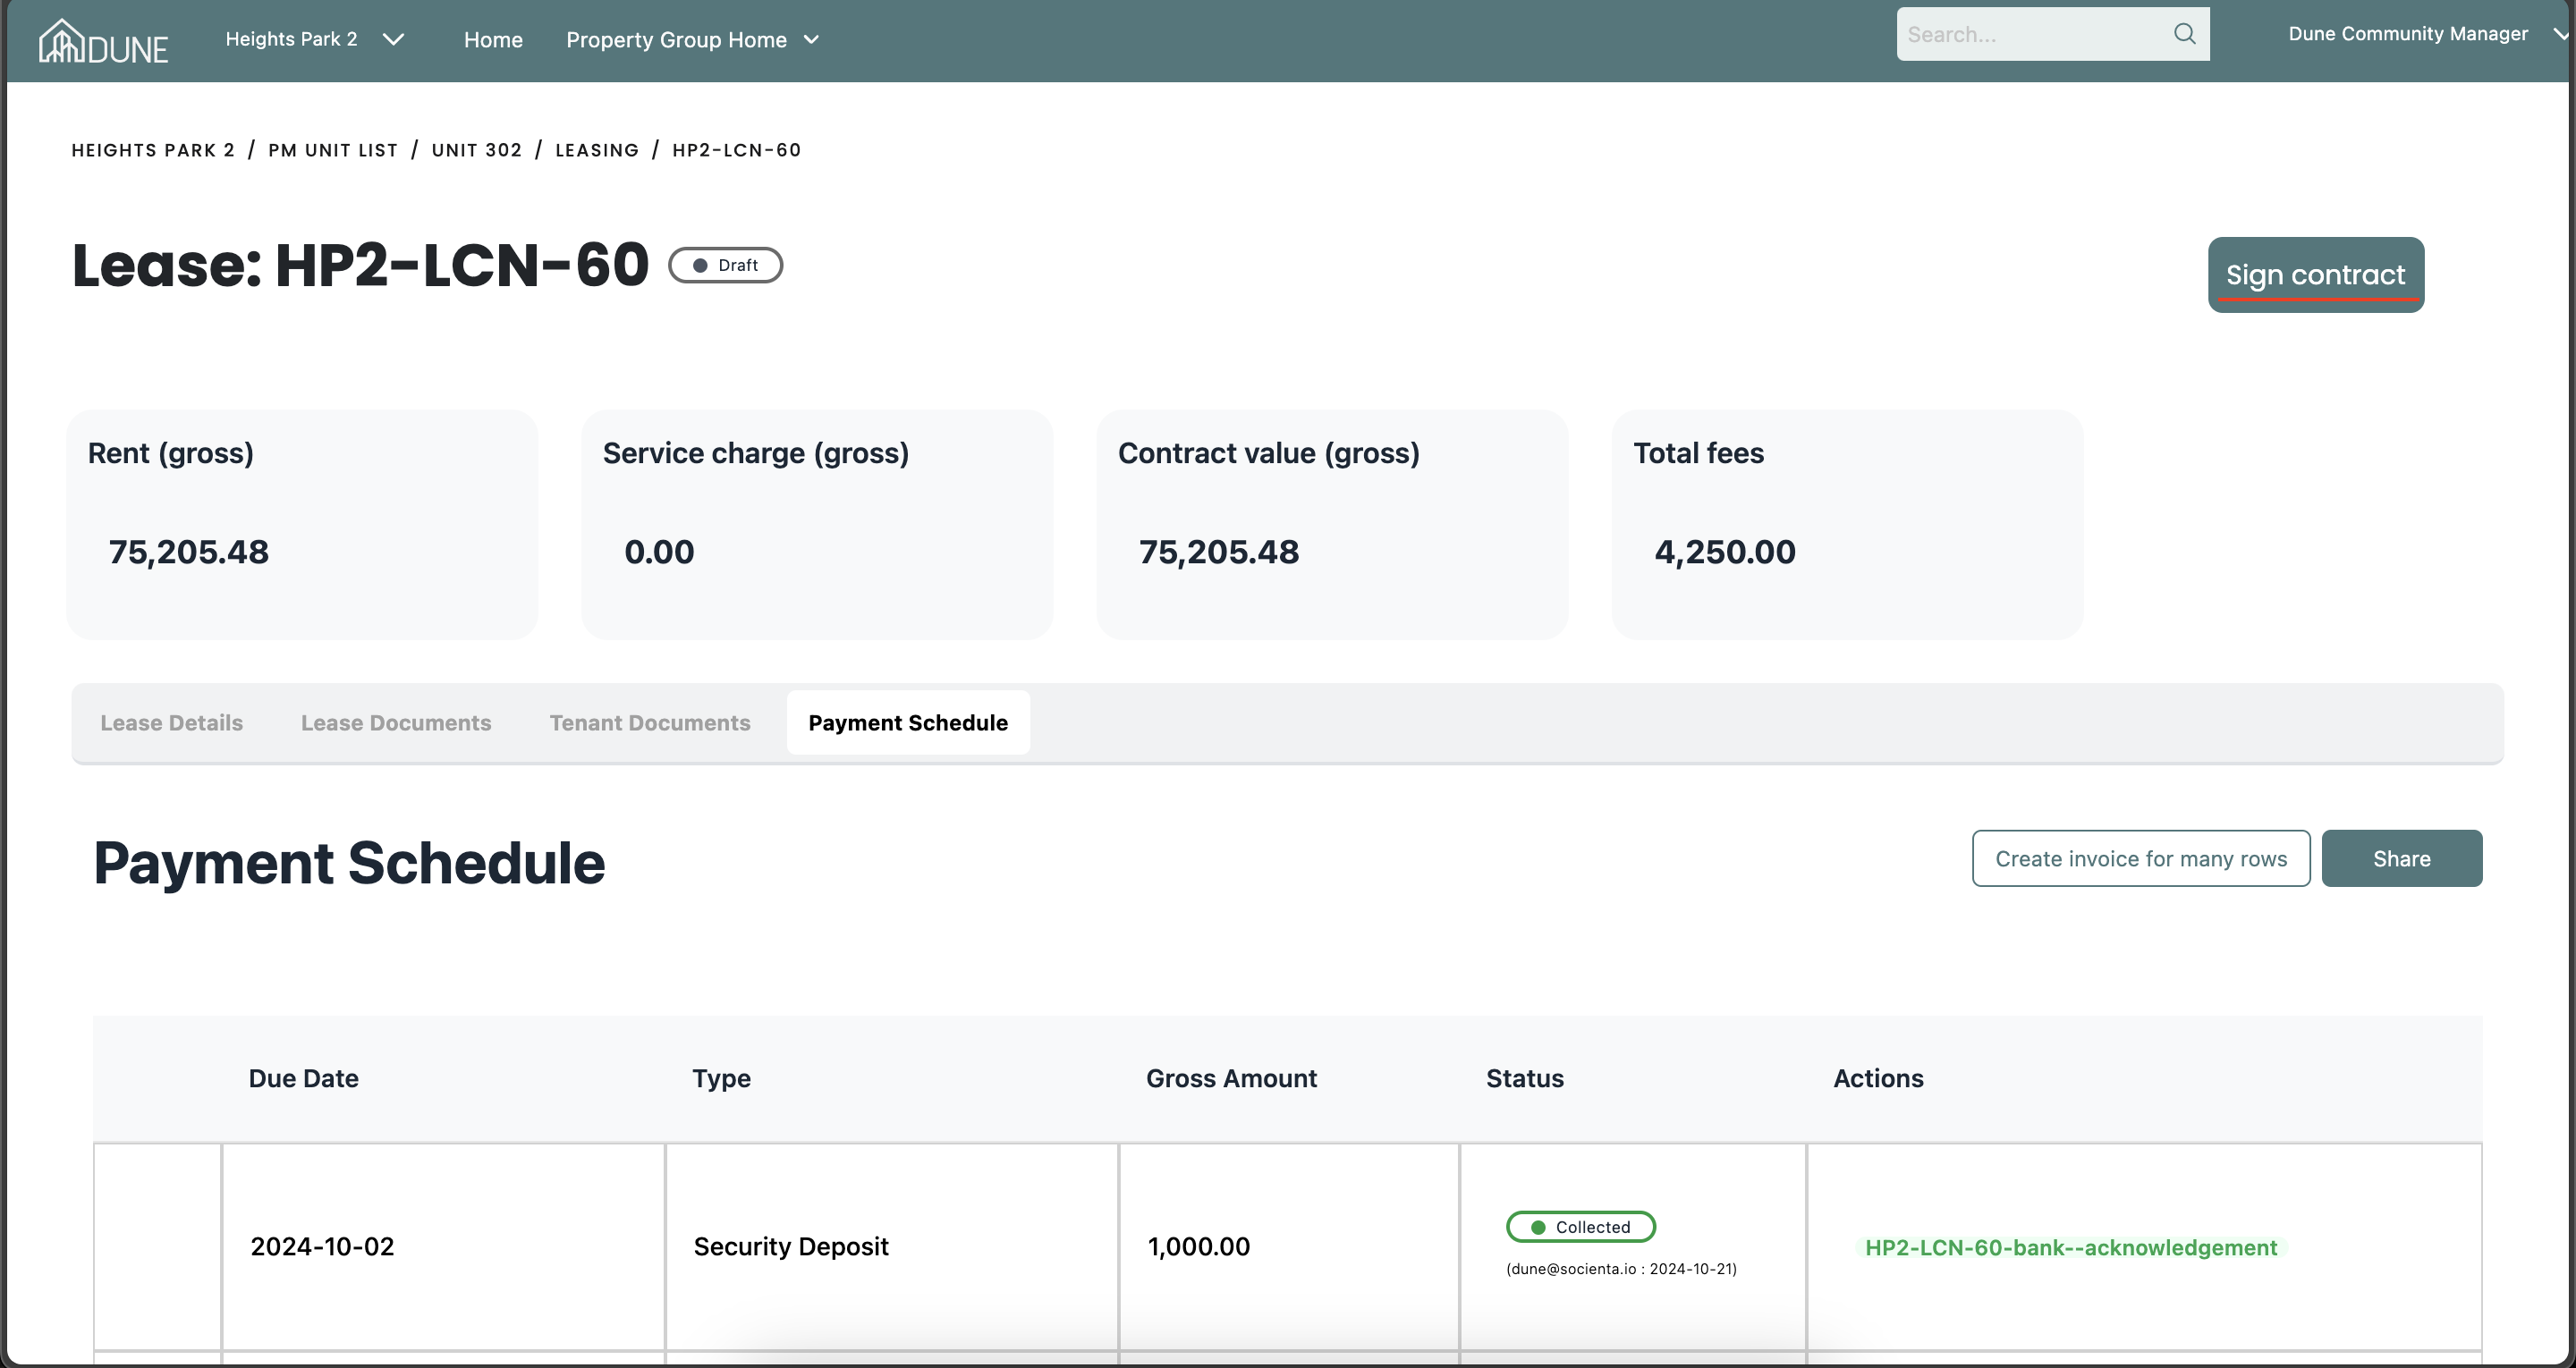
Payment Collection:
After successfully creating the payment schedule, you can view the payments and start collecting payments by clicking the Collect button.

Prepare for Contract Signing:
Before signing the contract, make sure to collect the following payments:
- Security Deposit
- Admin/Renewal Fee
- Ejari Fee
- Ejari Admin Fee
- Agency Fee
- First Rent Payment
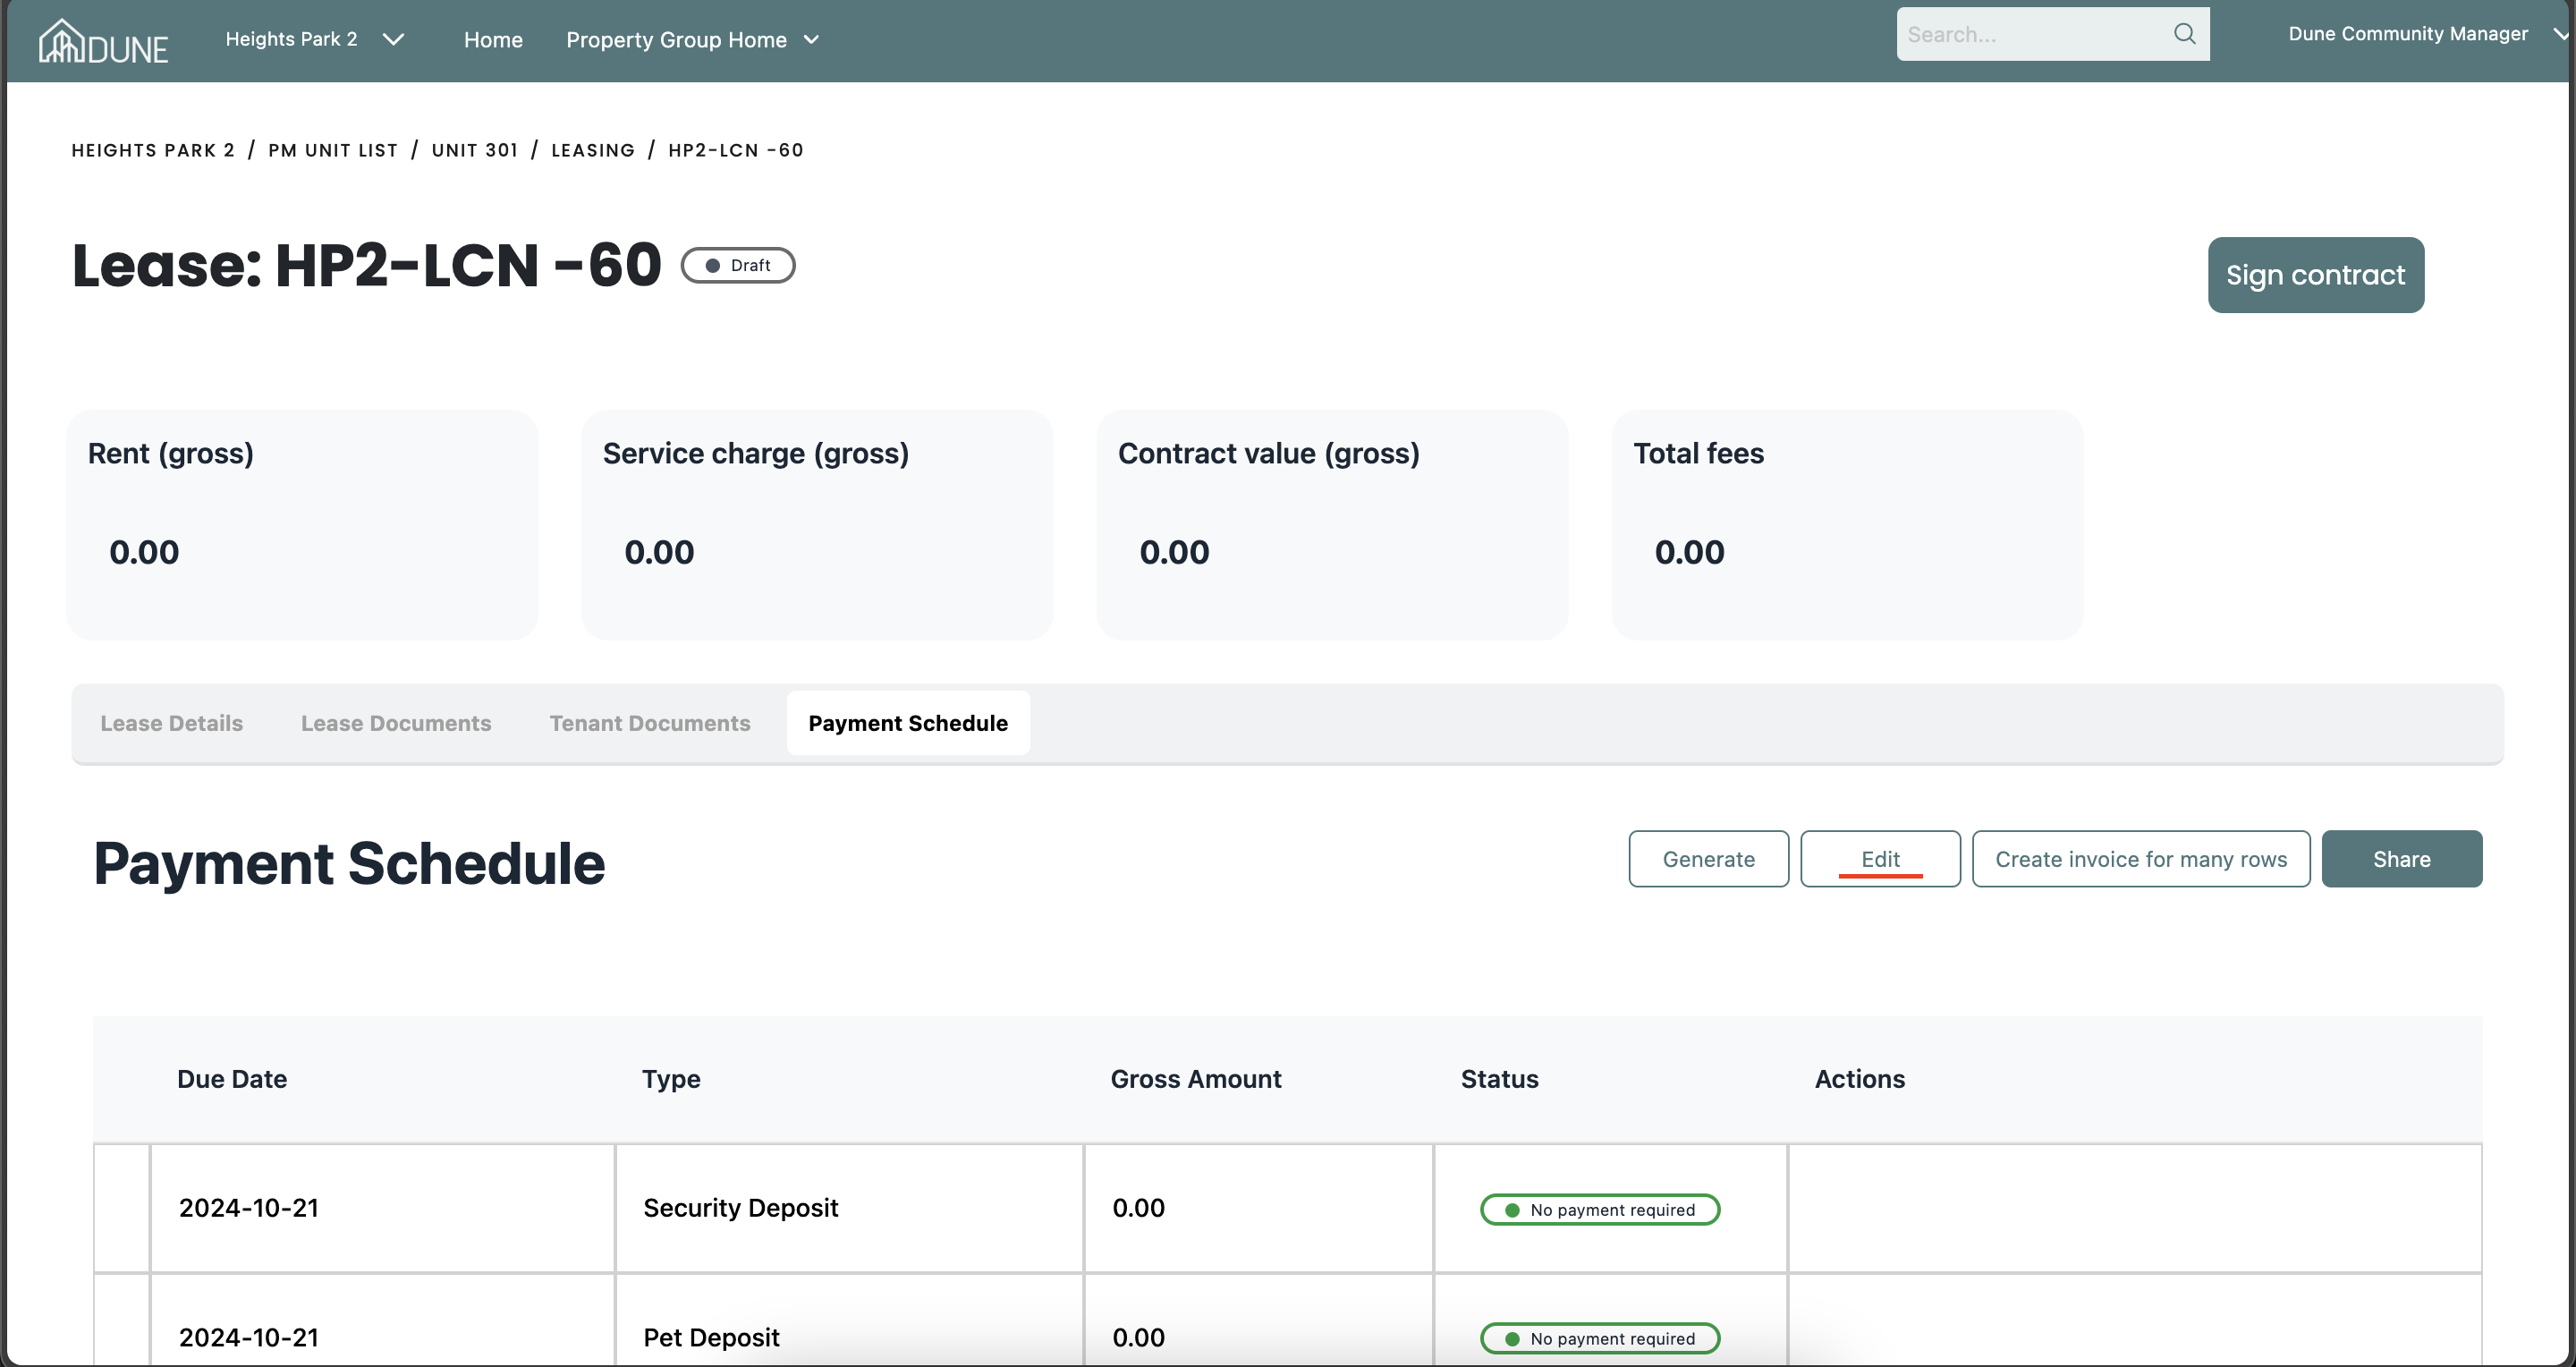
Sign the Contract:
Once all requirements are fulfilled, click the Sign Contract button.
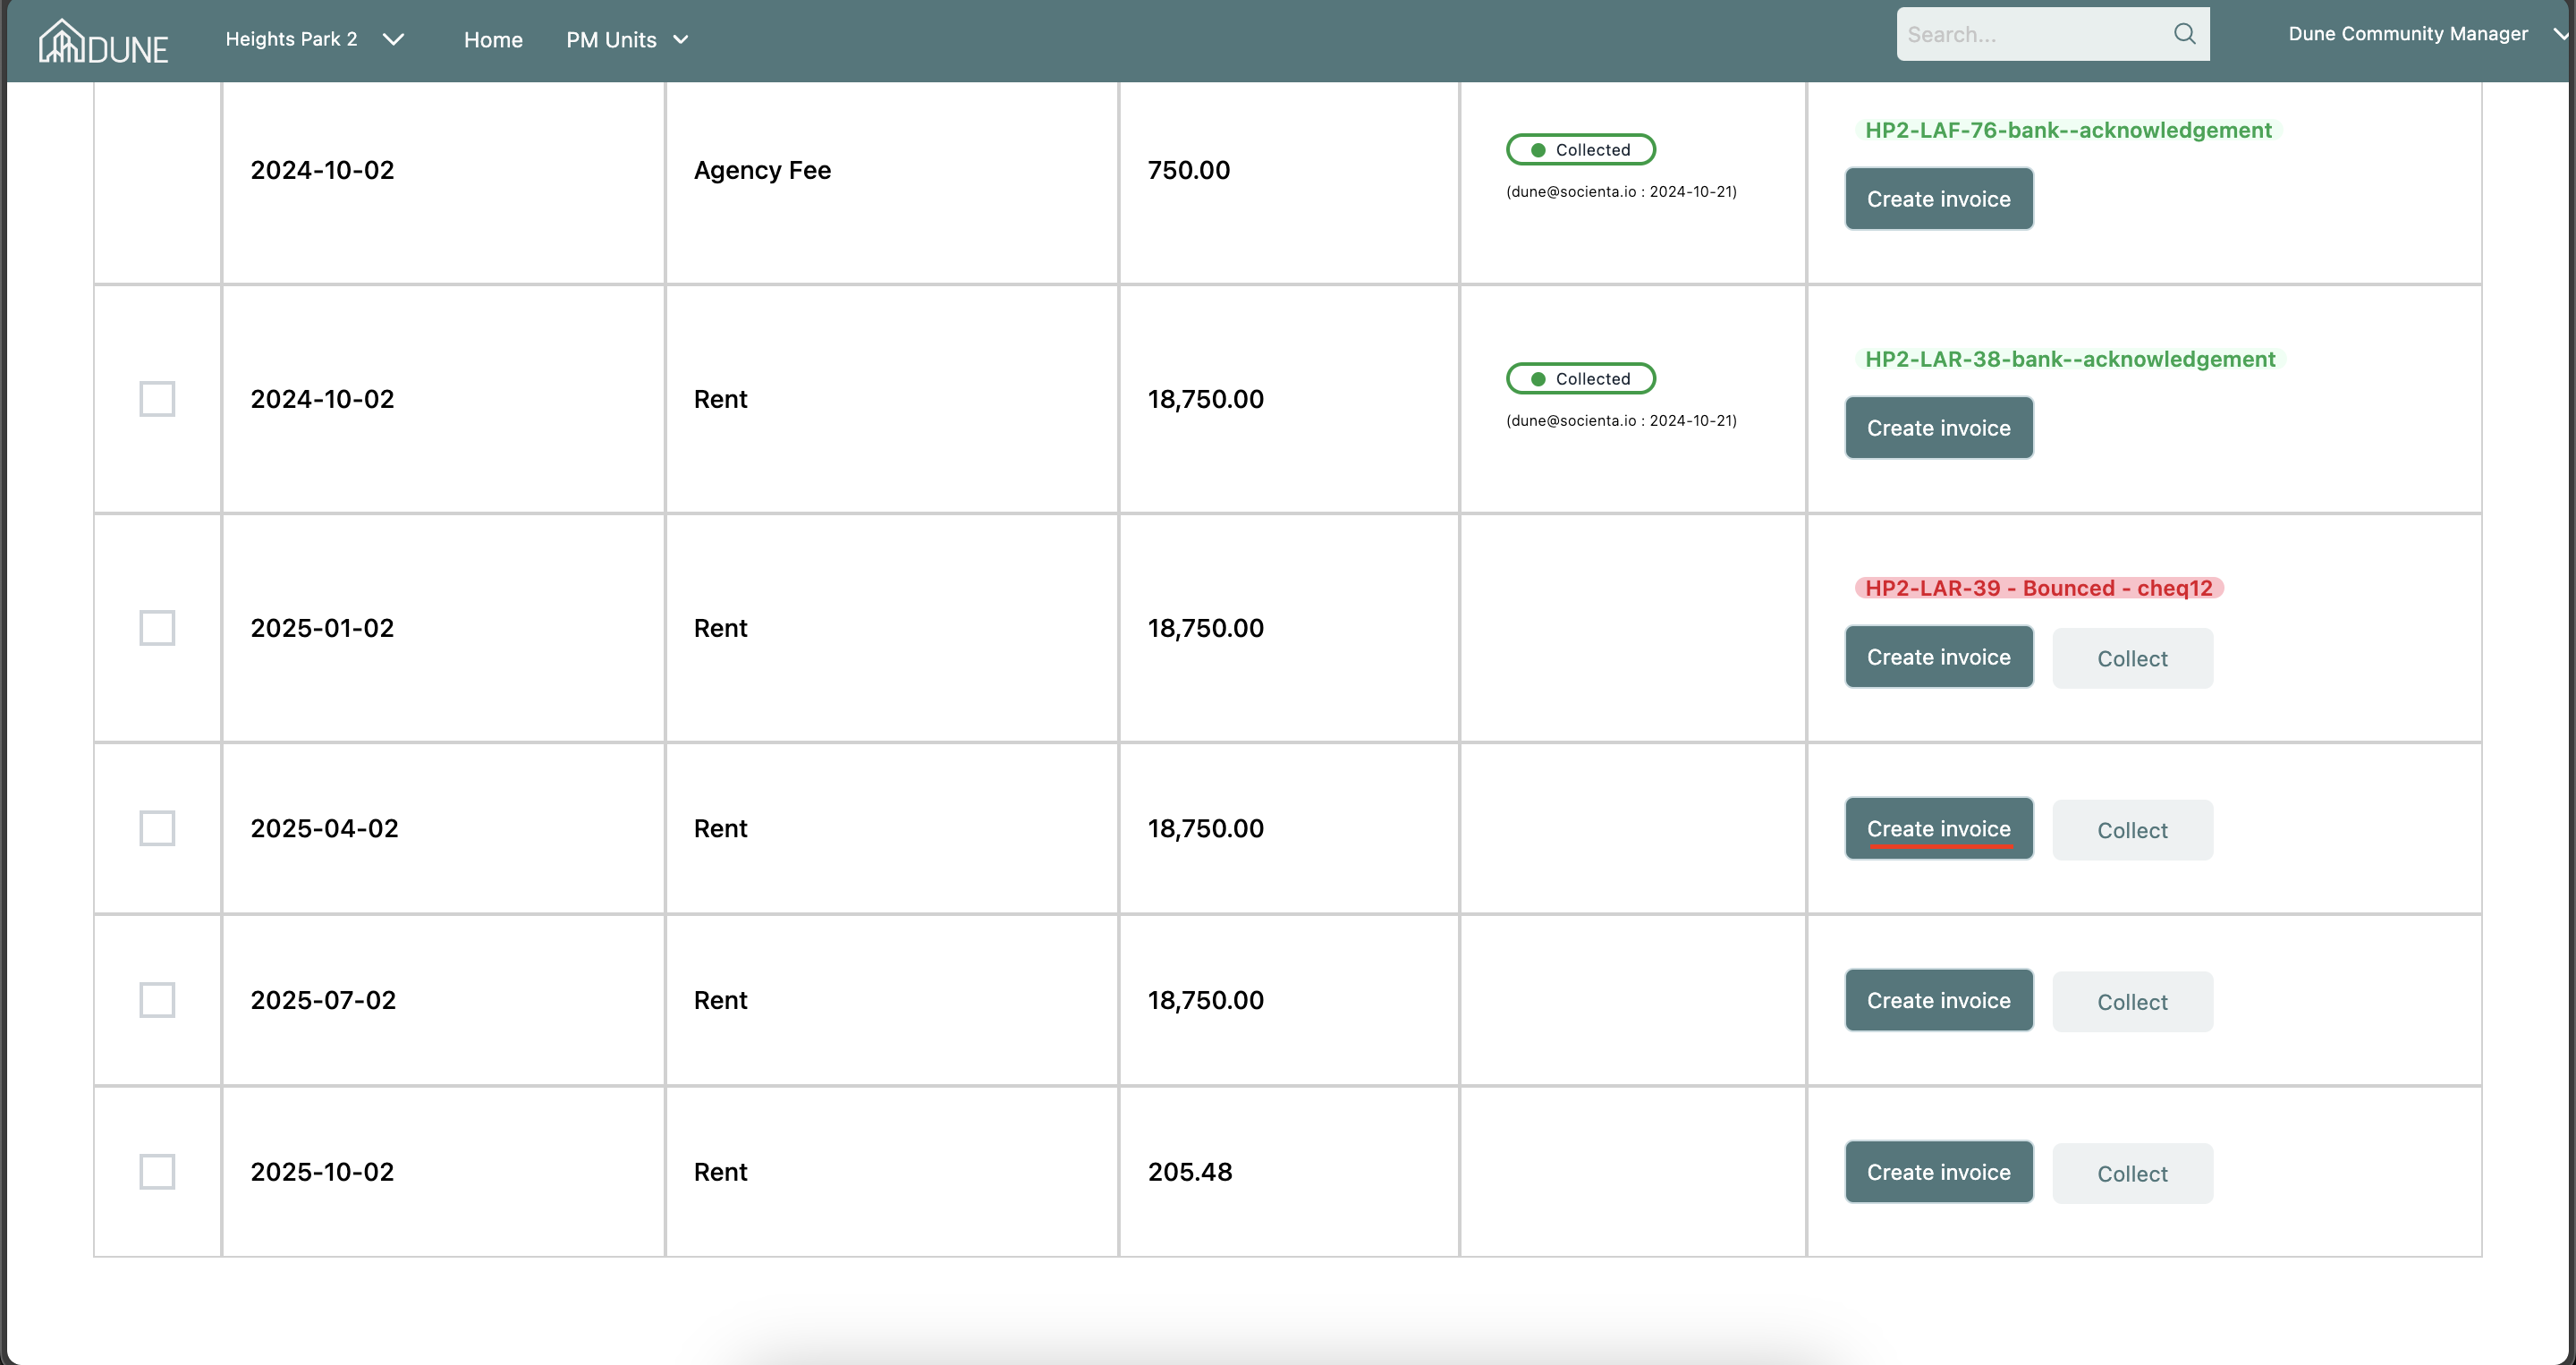
Create Invoices:
After signing the contract, you can create invoices for the payments you collect. Alternatively, you can create the invoices before collecting the rest of the rent payments by clicking the Create Invoice button.
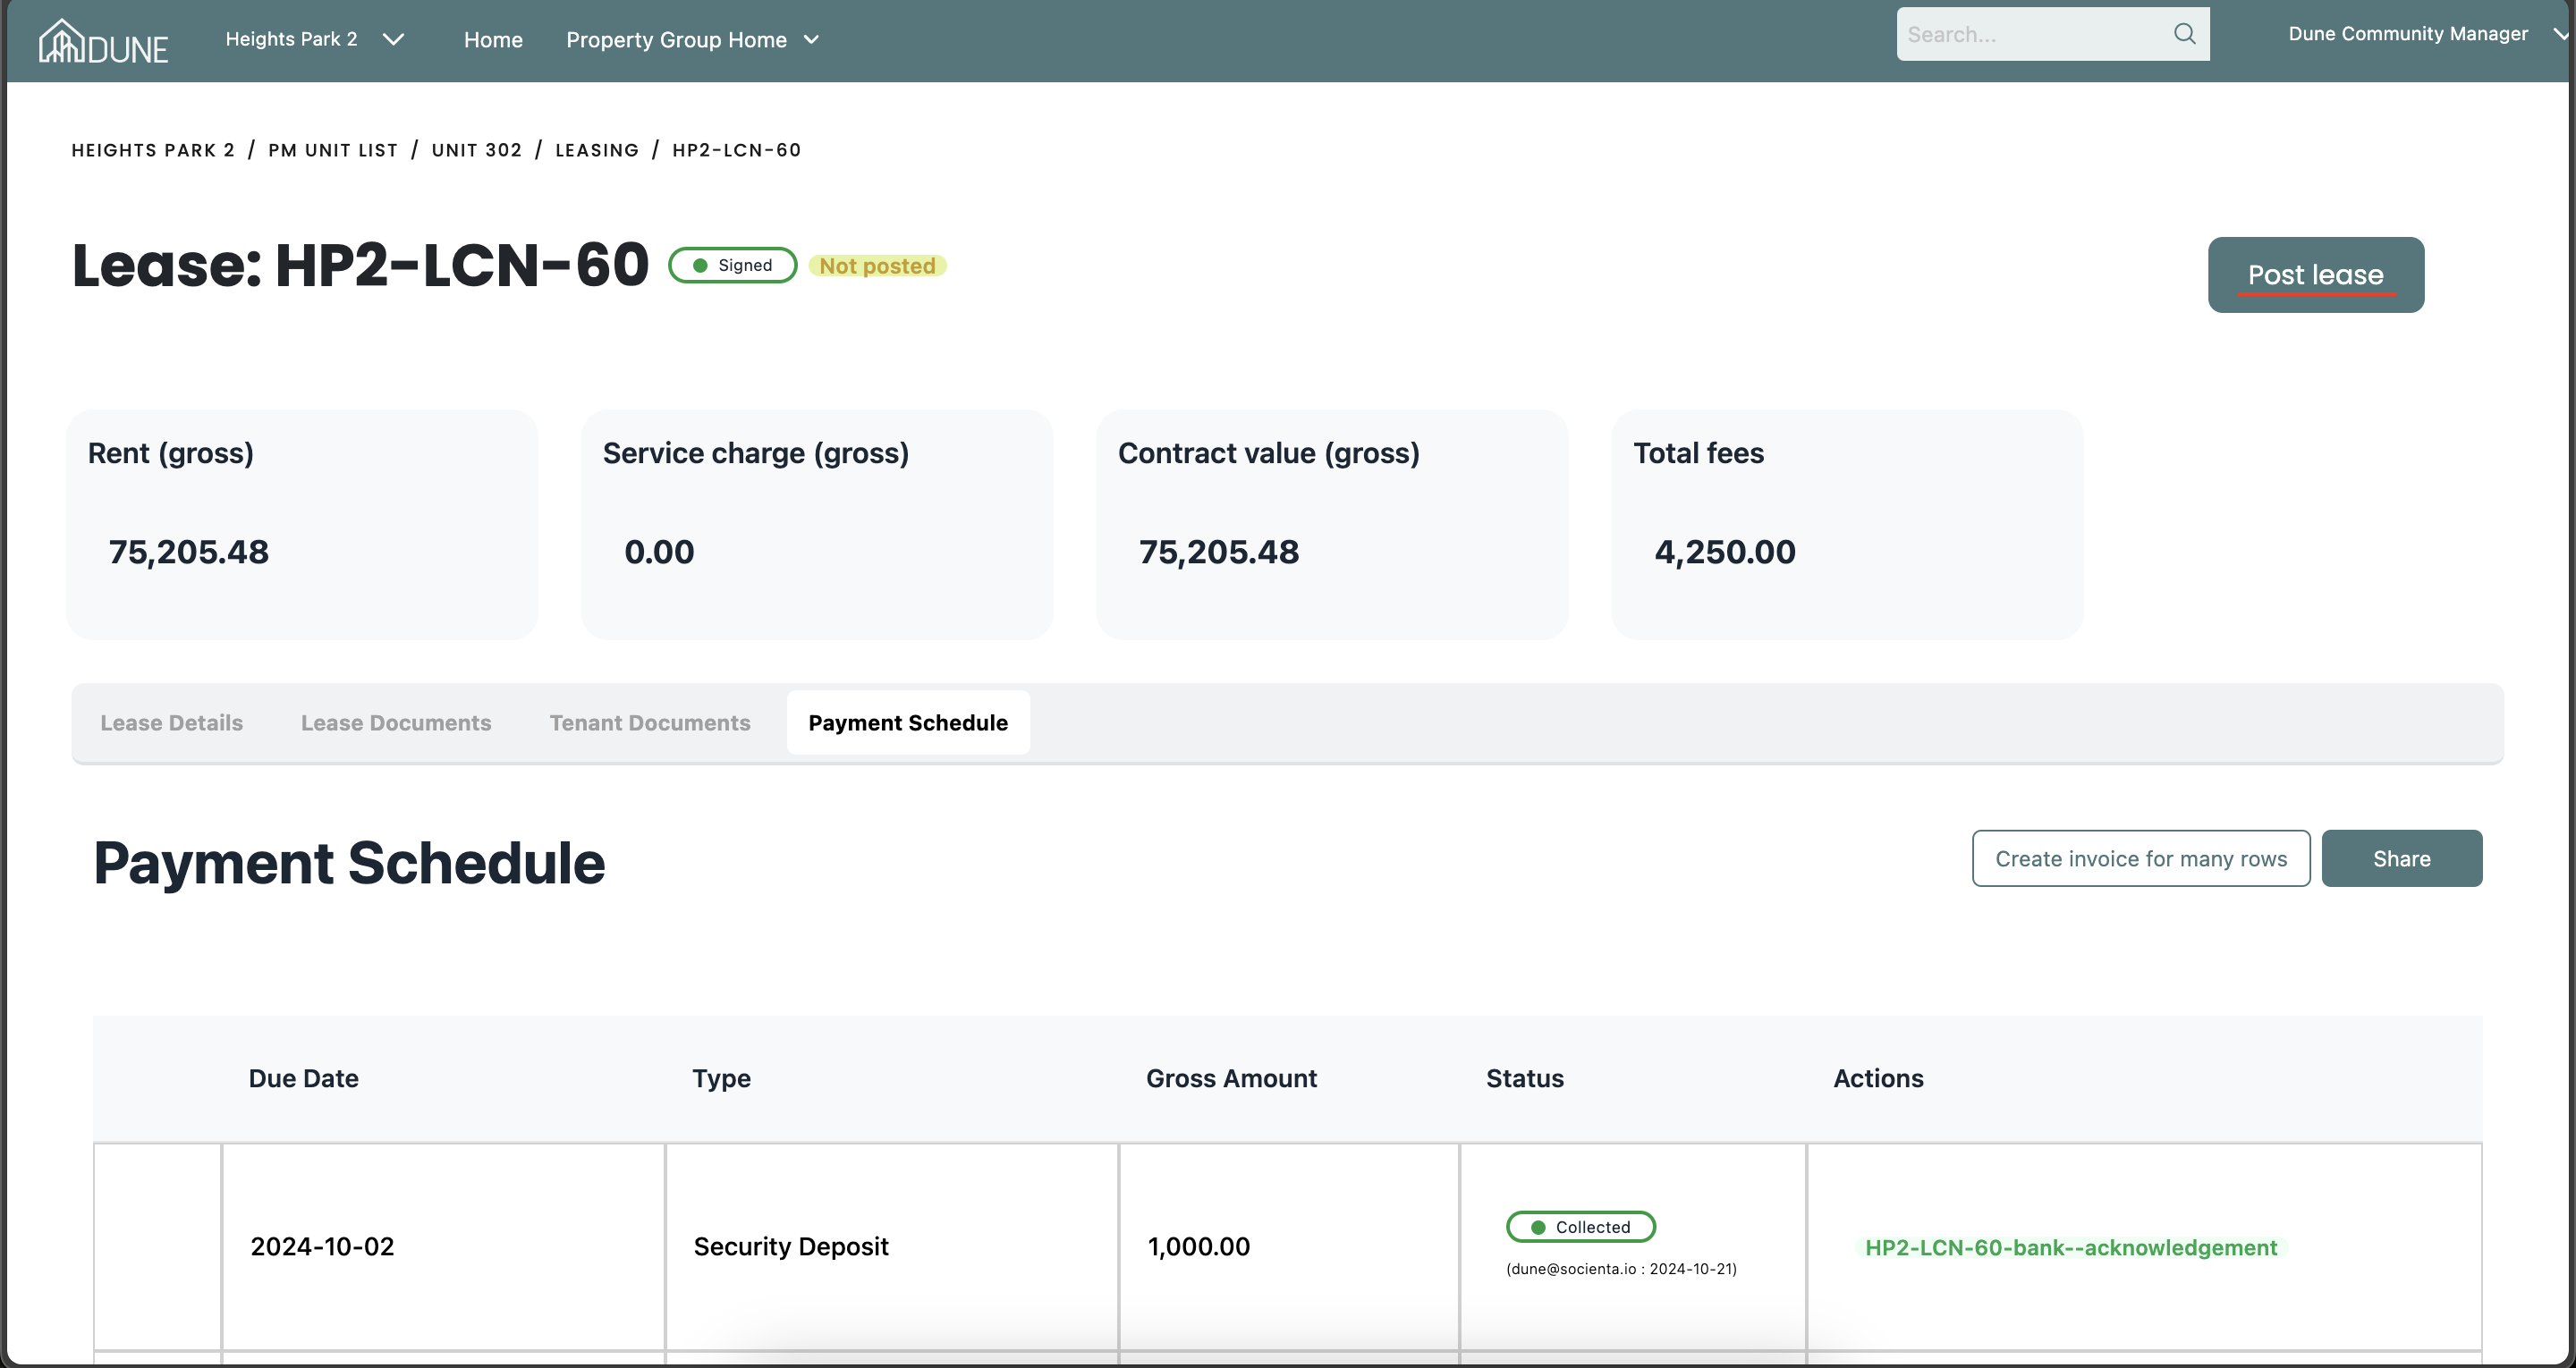
Post the Lease:
After signing, Click the Post Lease button to post the financial reflection in the accounting section.
Tips and Tricks:
Edit the Payment Schedule:
- After generating the payment schedule and before signing it, you can click the Edit button.
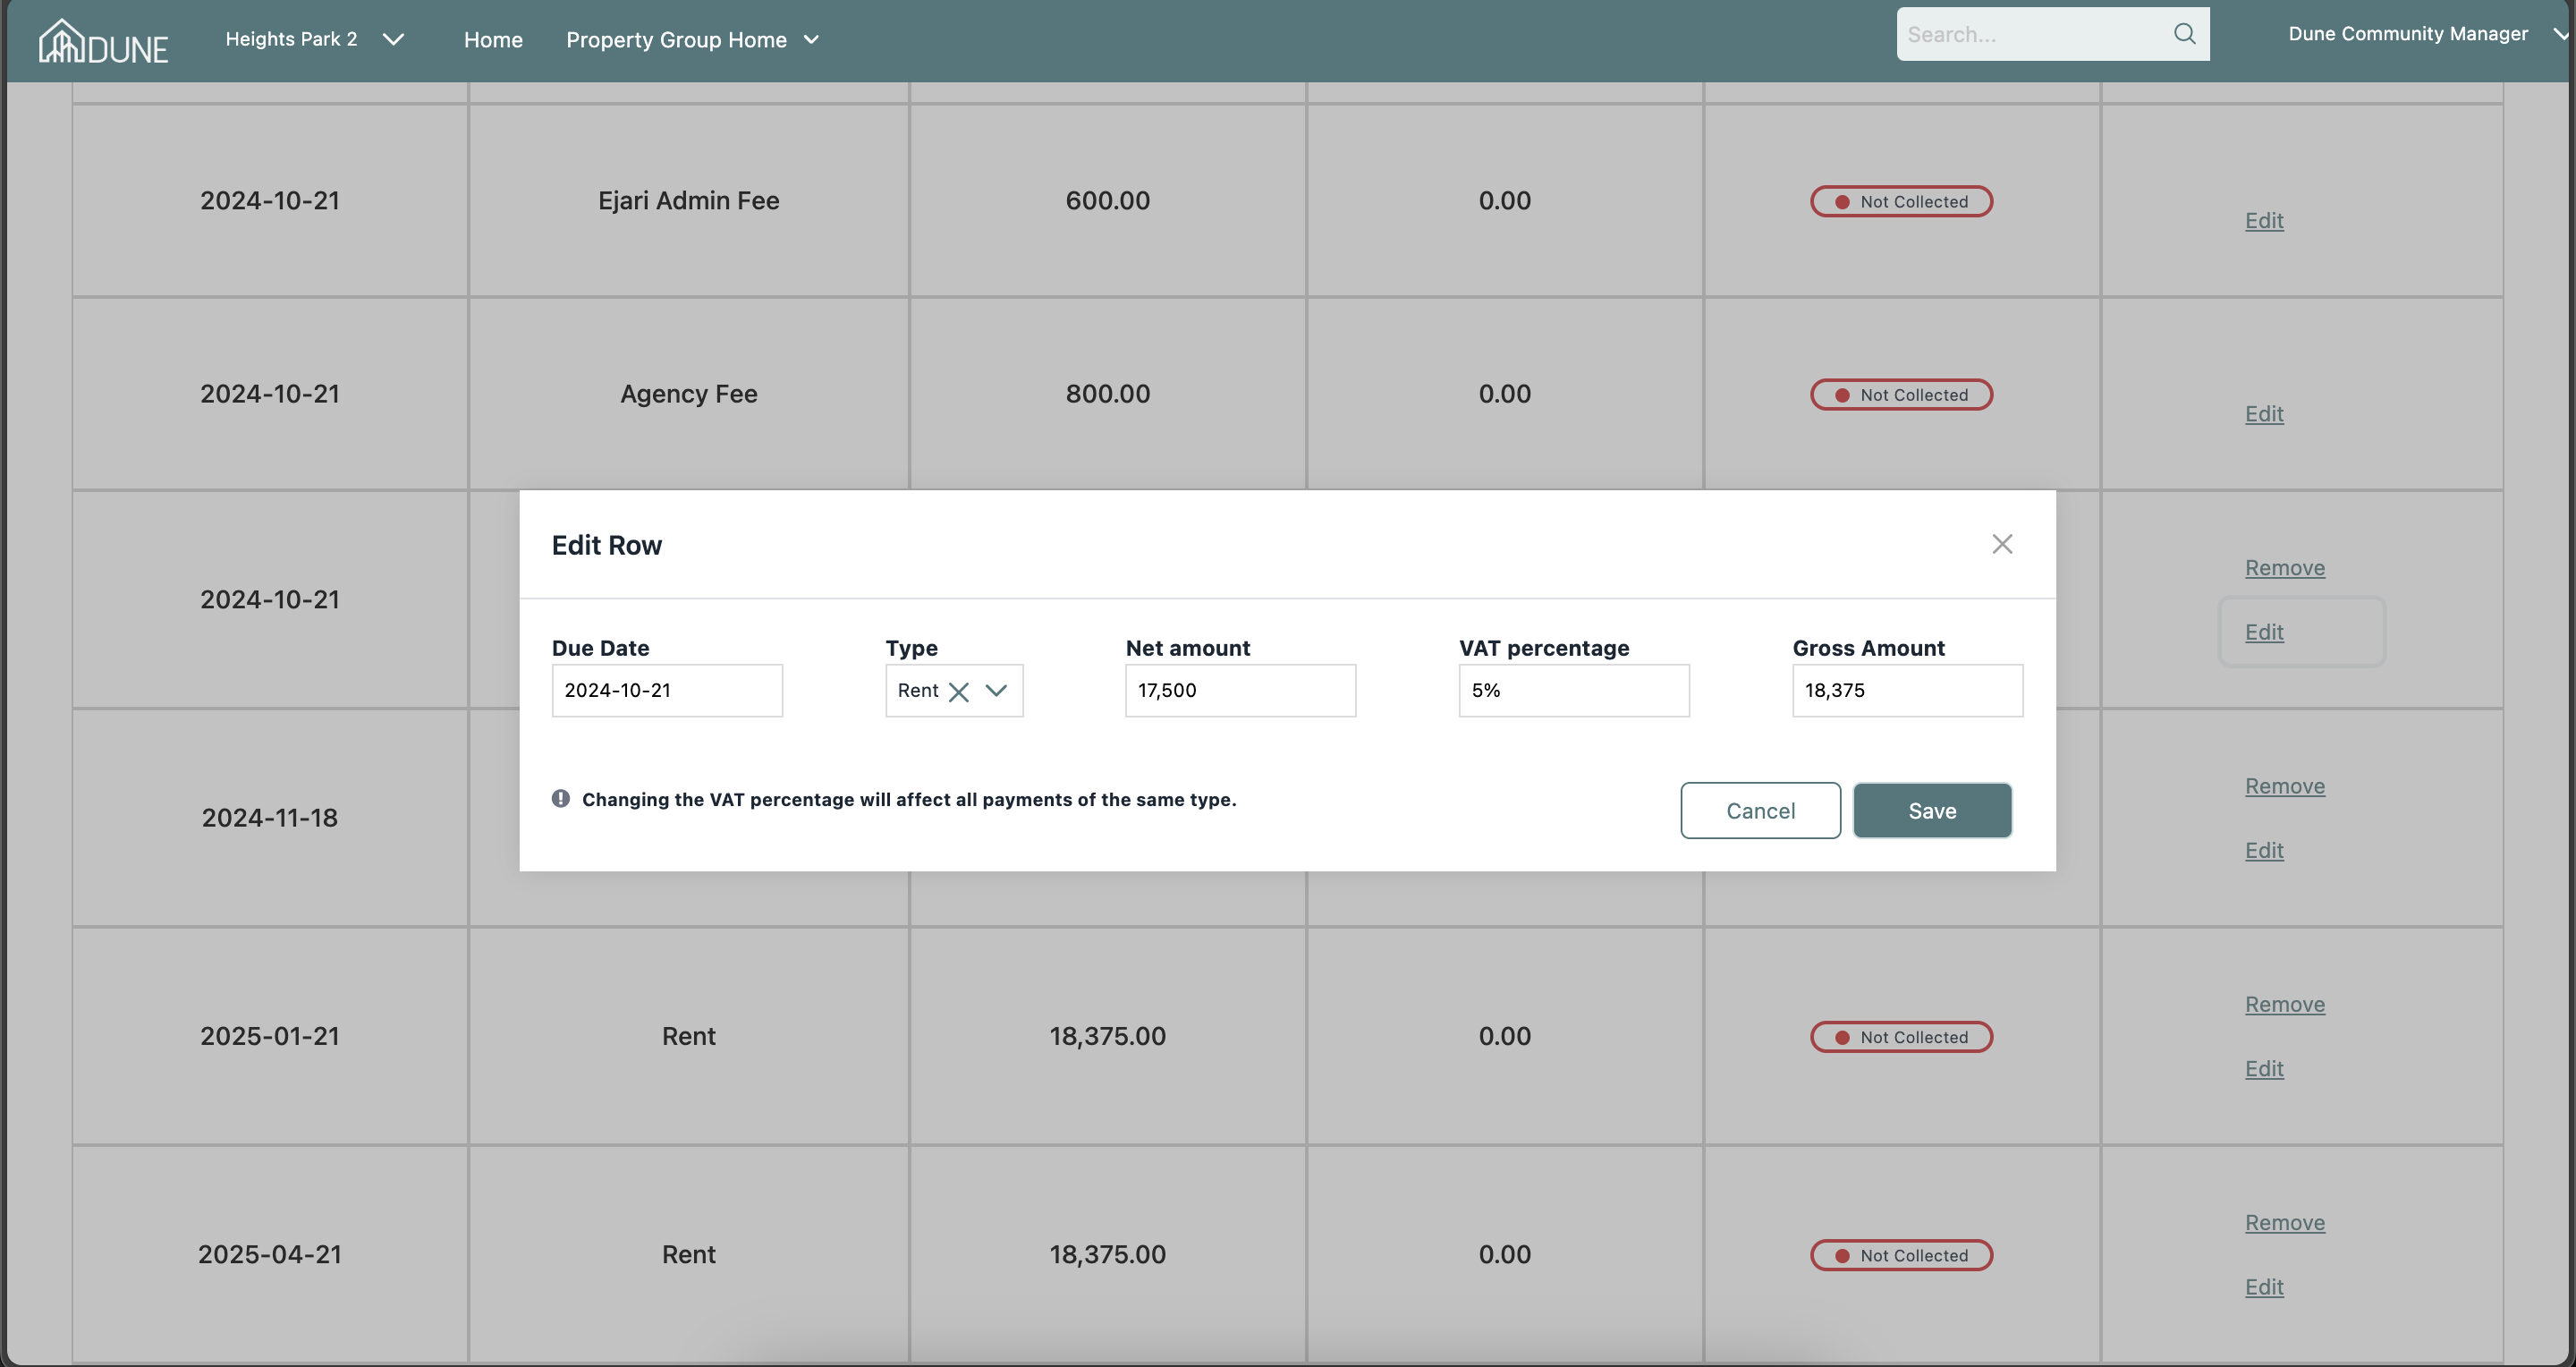
Make Adjustments to Payments:
- On the Payment Schedule page, click Edit to modify payments.
- For rent payments, you can remove one payment (e.g., if you need to collect in a single payment) and adjust the others. A pop-up screen will allow you to enter new amounts and payment types. Click Save when done.
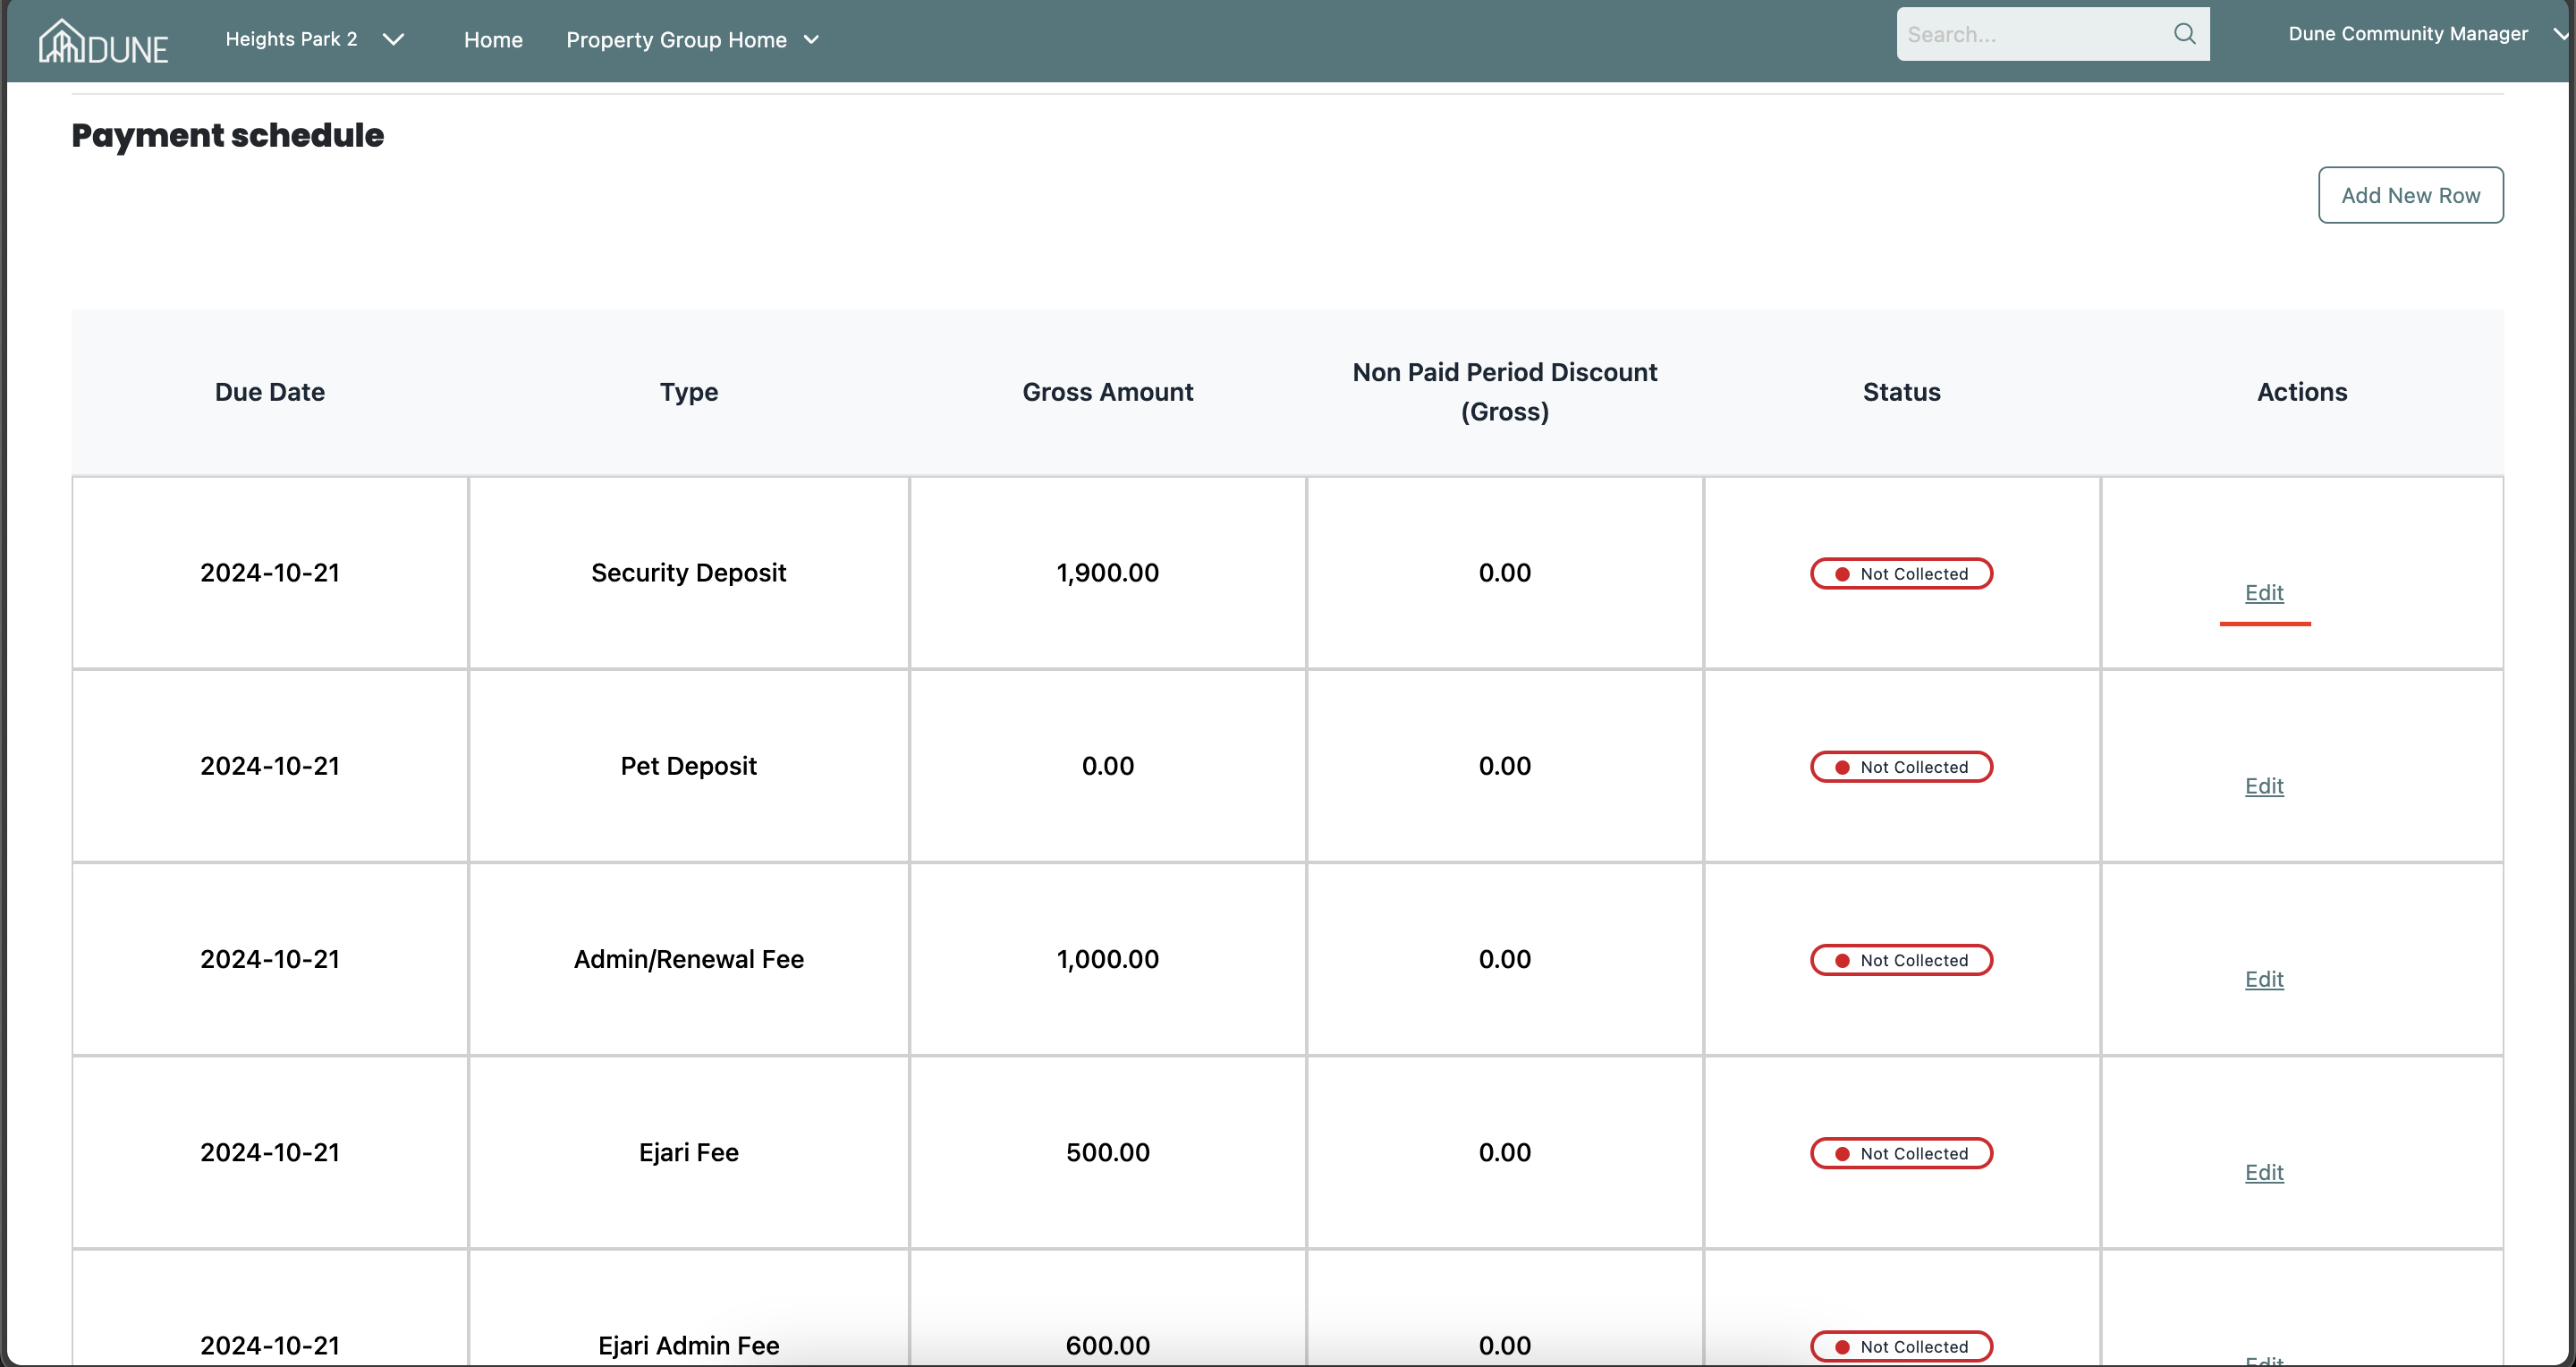
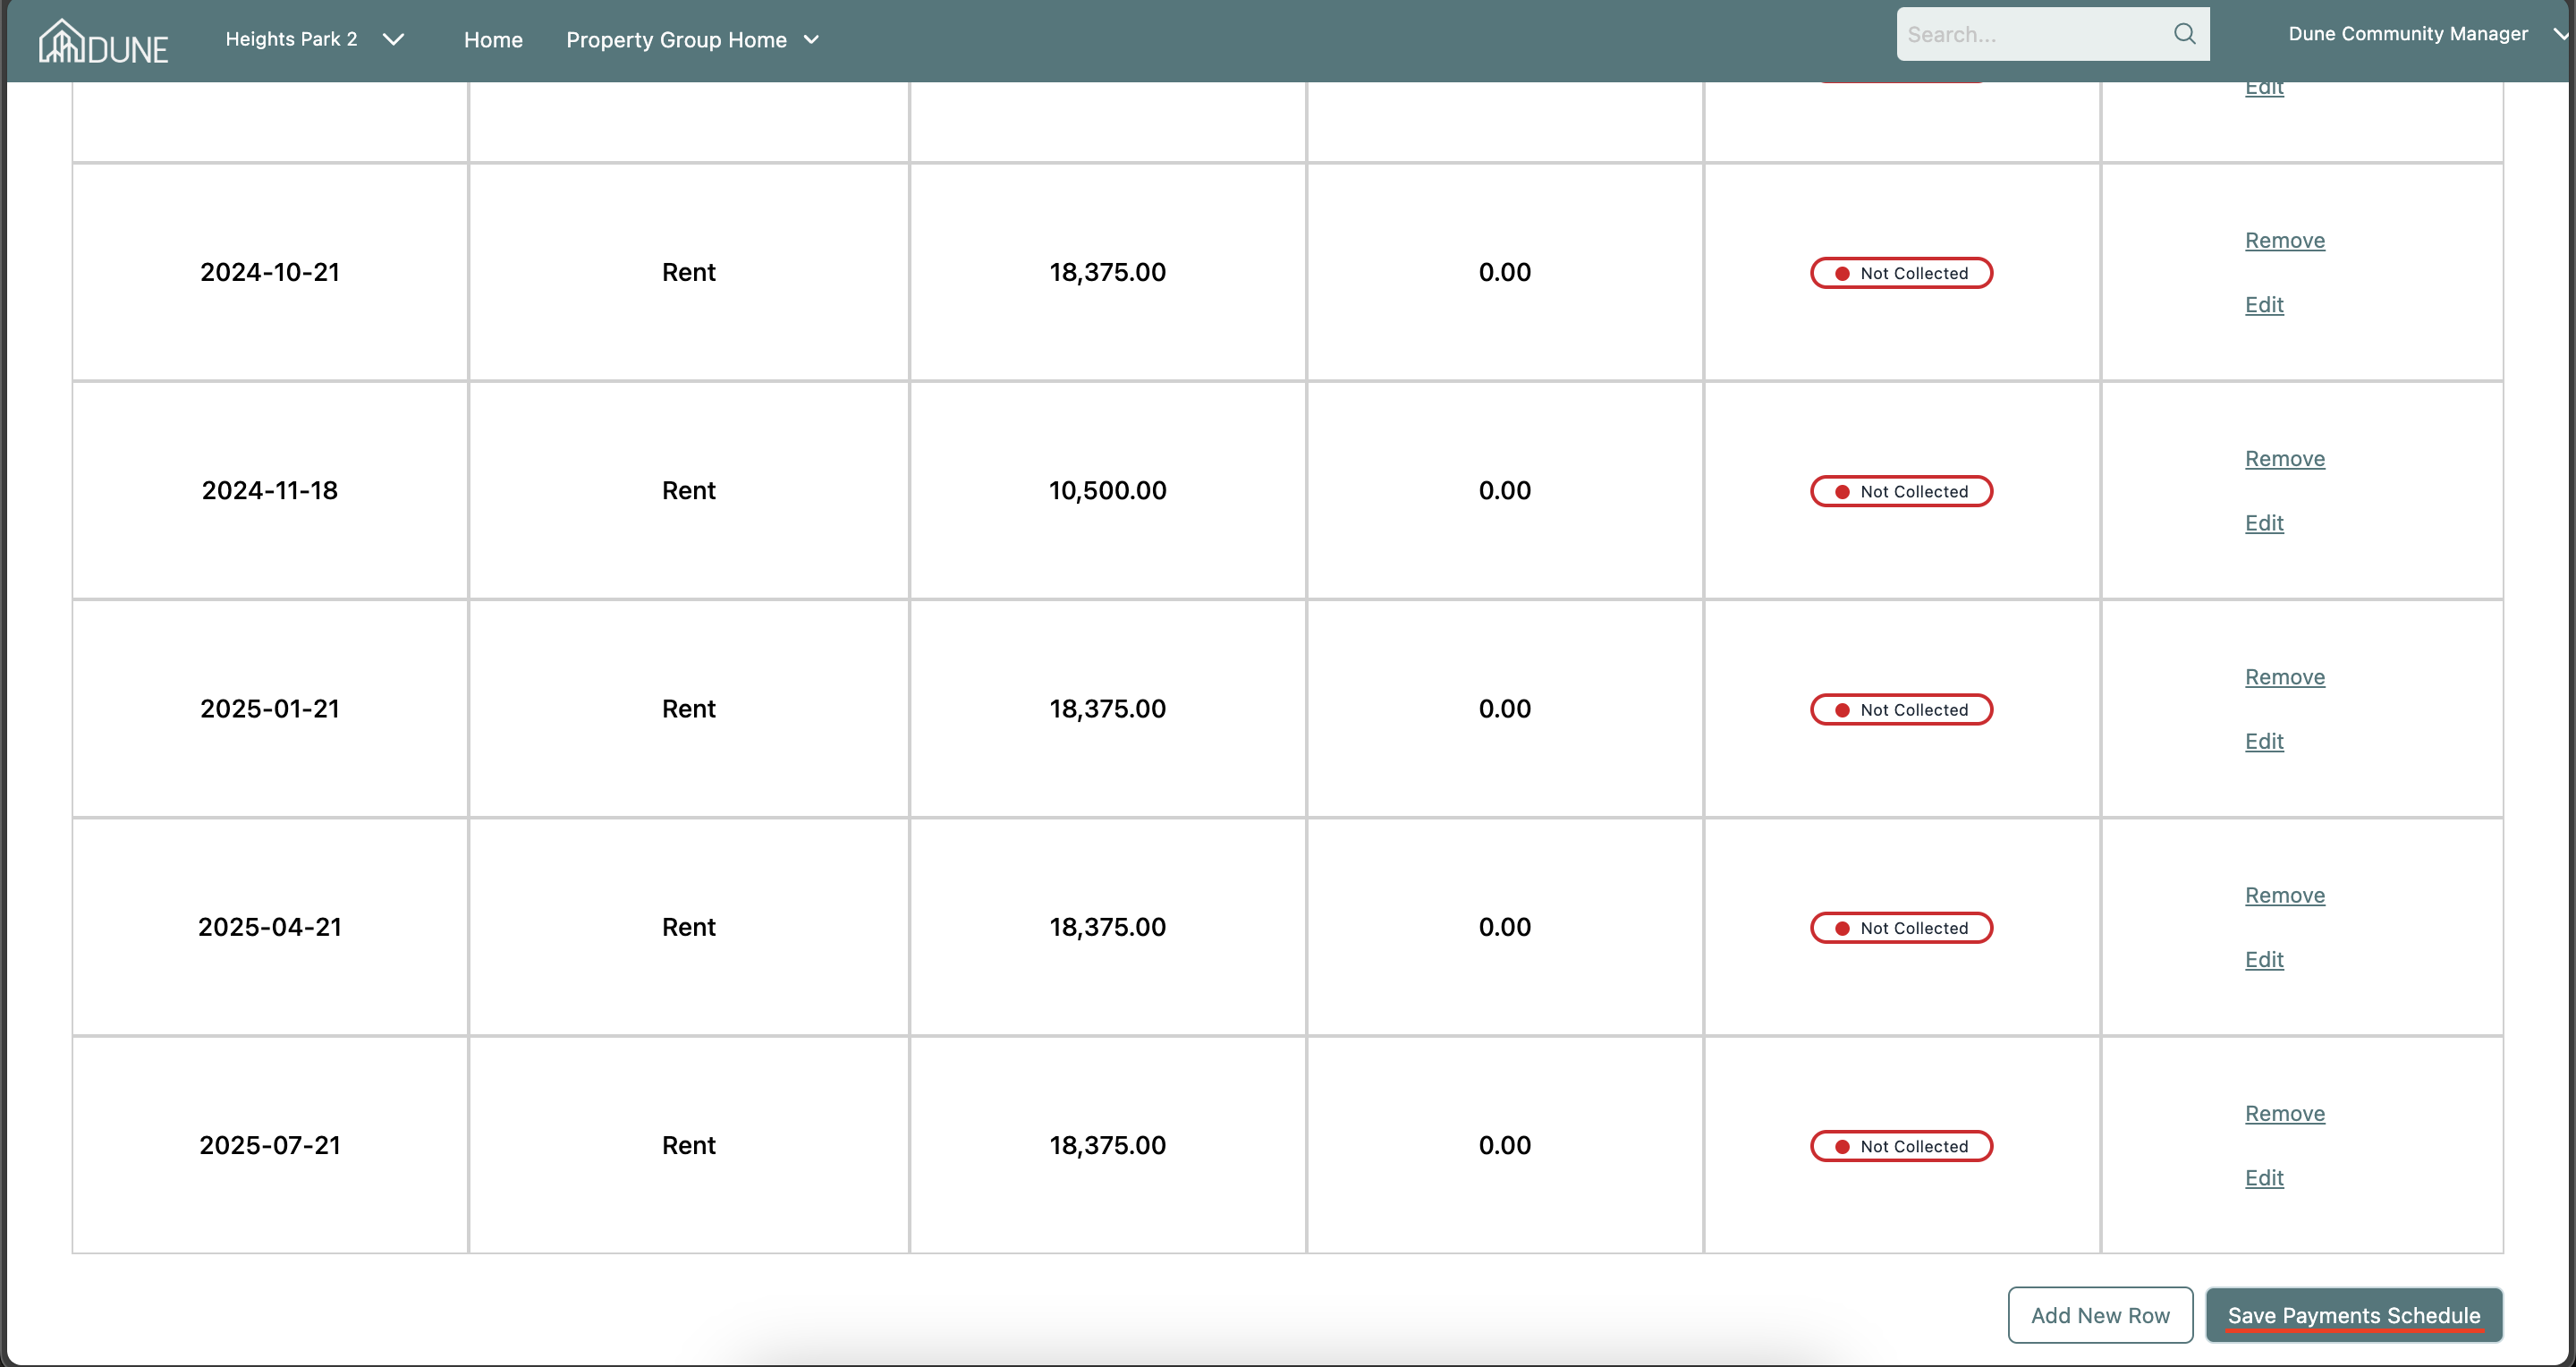
Add New Payment Rows:
- You can add additional payment rows to the existing schedule by clicking Add New Row.

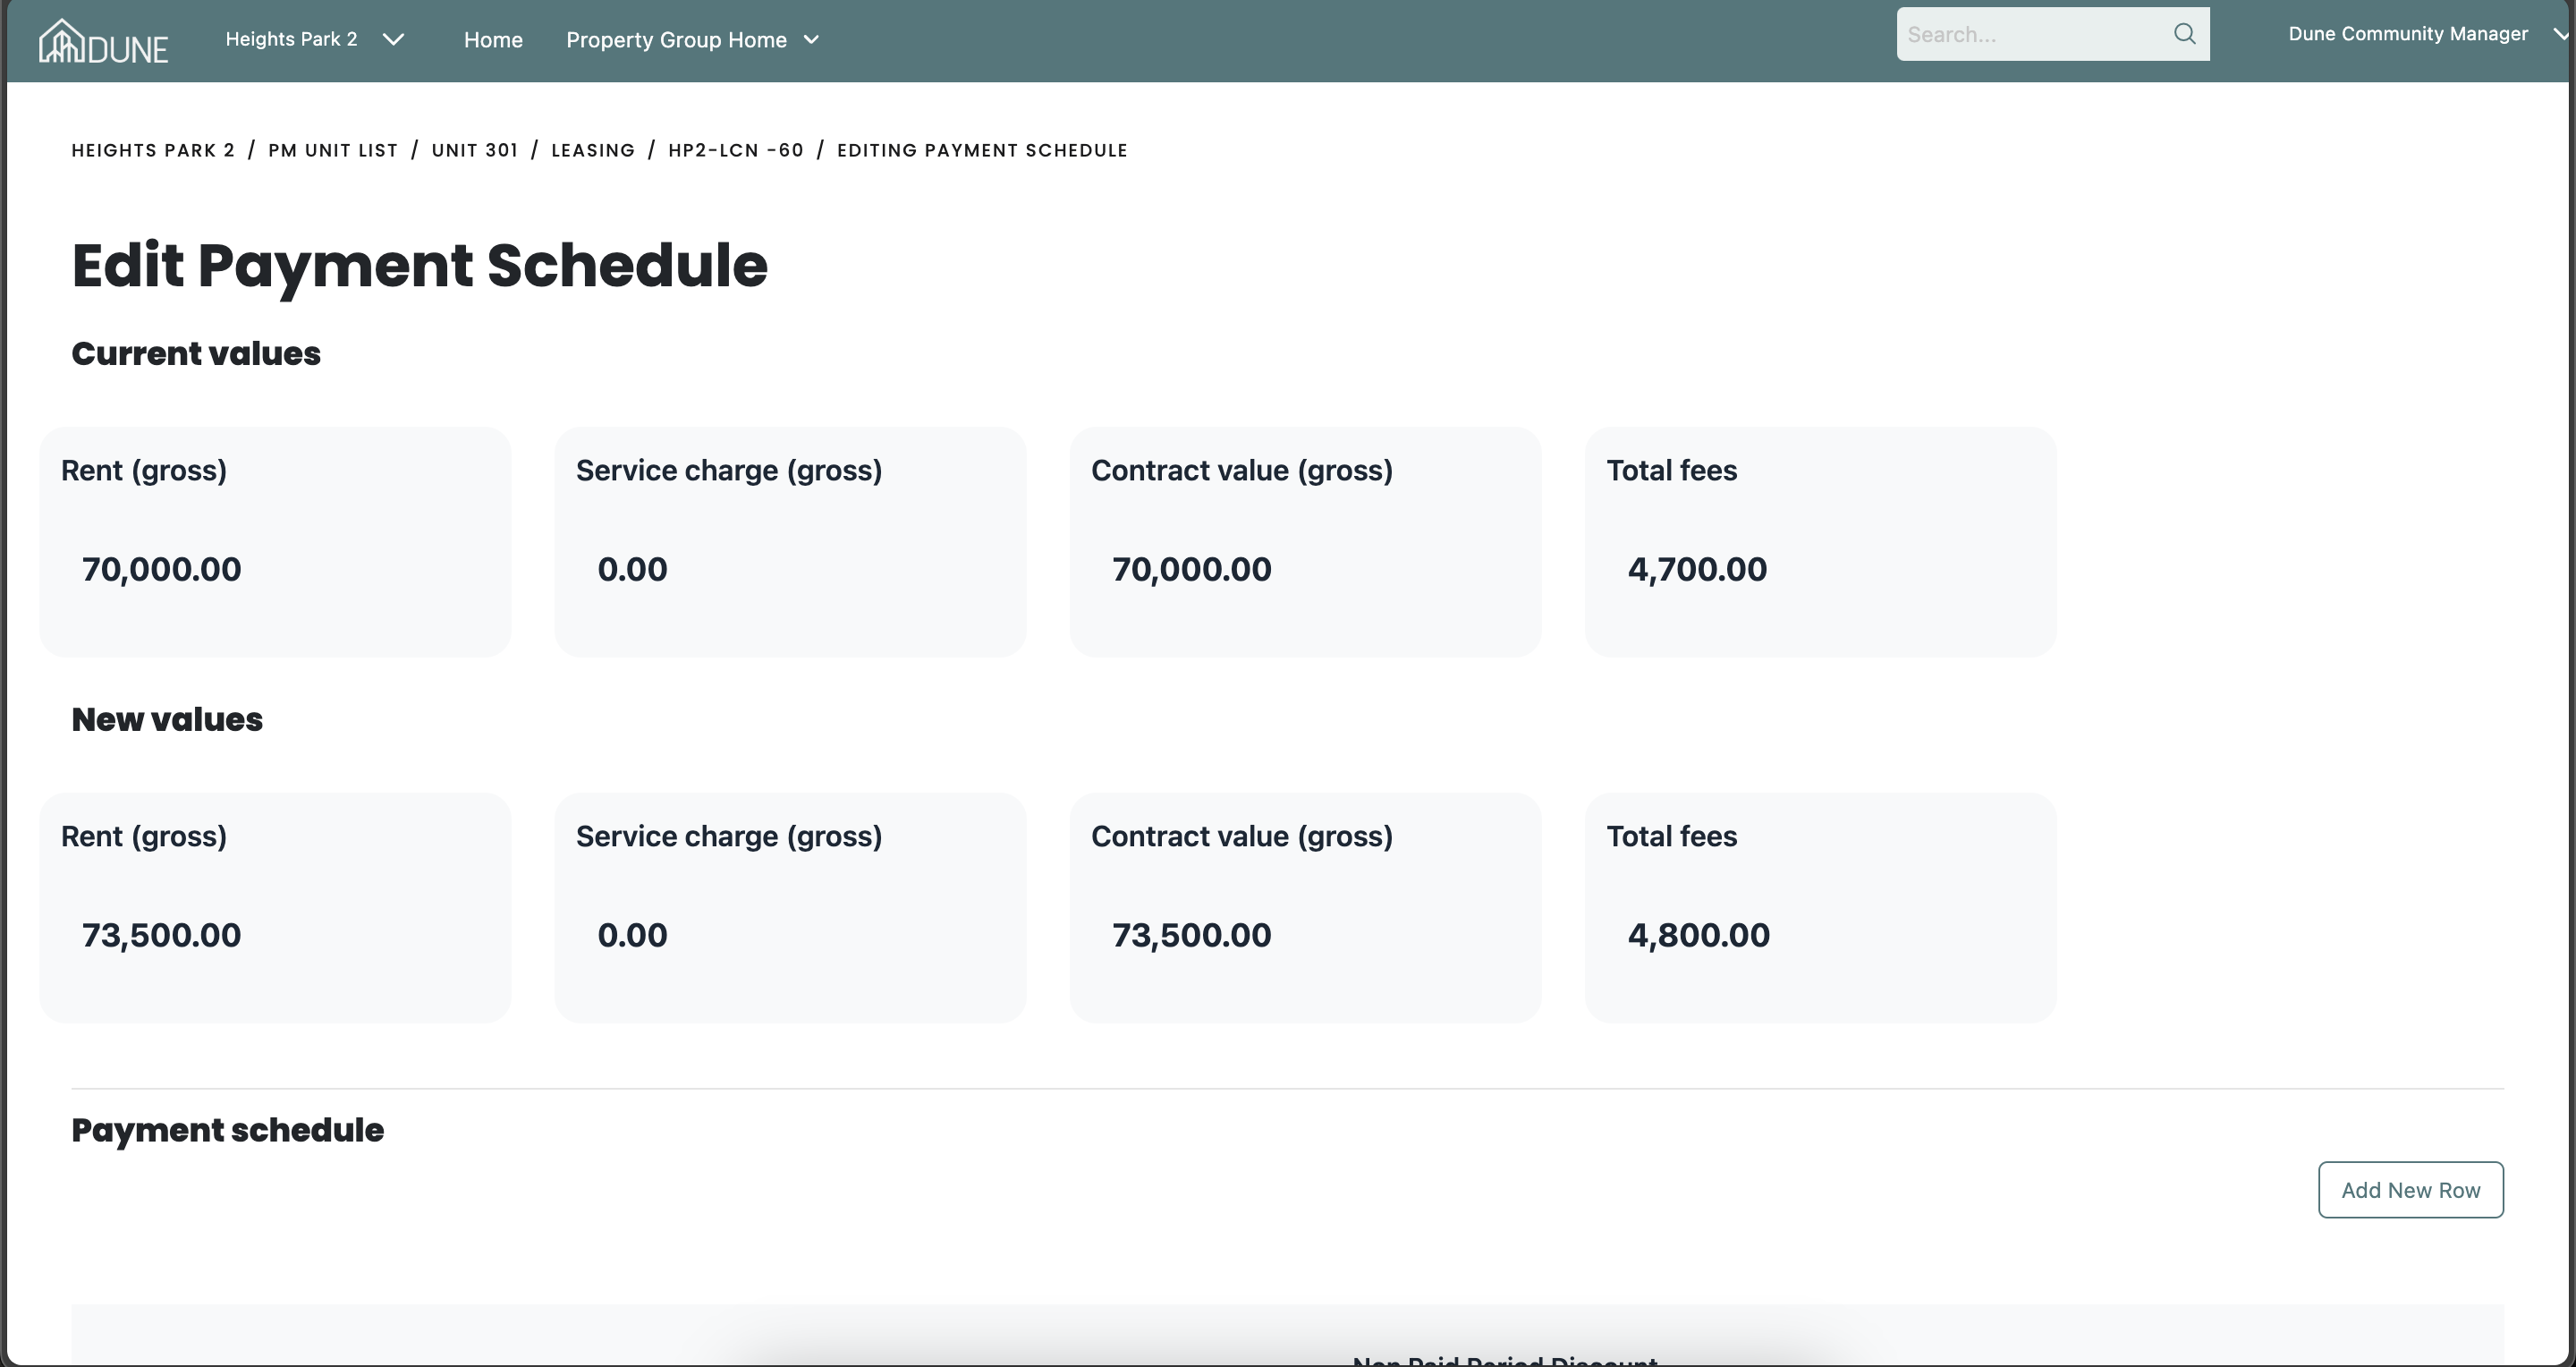
Review Changes:
- After editing payments, compare the Current Values and New Values. If everything looks correct, click the Save Payment Schedule button at the bottom of the screen.
Was this article helpful?
That’s Great!
Thank you for your feedback
Sorry! We couldn't be helpful
Thank you for your feedback
Feedback sent
We appreciate your effort and will try to fix the article